Introduction
The following is a user experience (UX) guide for Augment’s Web and Mobile Software Development Kit (SDK). The following pages will clarify the user journey, as well as provide accompanying UX recommendations as your user lands on the product page, discovers the AR Button, and views products in augmented reality.
Offering a new function on a platform will often raise questions about the steps. Therefore, it is this guide’s goals to help you provide, in presentation and in wording, the best experience for your users to ensure their success in experiencing augmented reality.
While these recommendations were compiled from Augment’s internal user testing, we also strongly encouraged you to test the workflow with your own users before release.
User Journey for Web
The following user journey explains the steps required for a user to successfully visualize a product in augmented reality.
On desktop
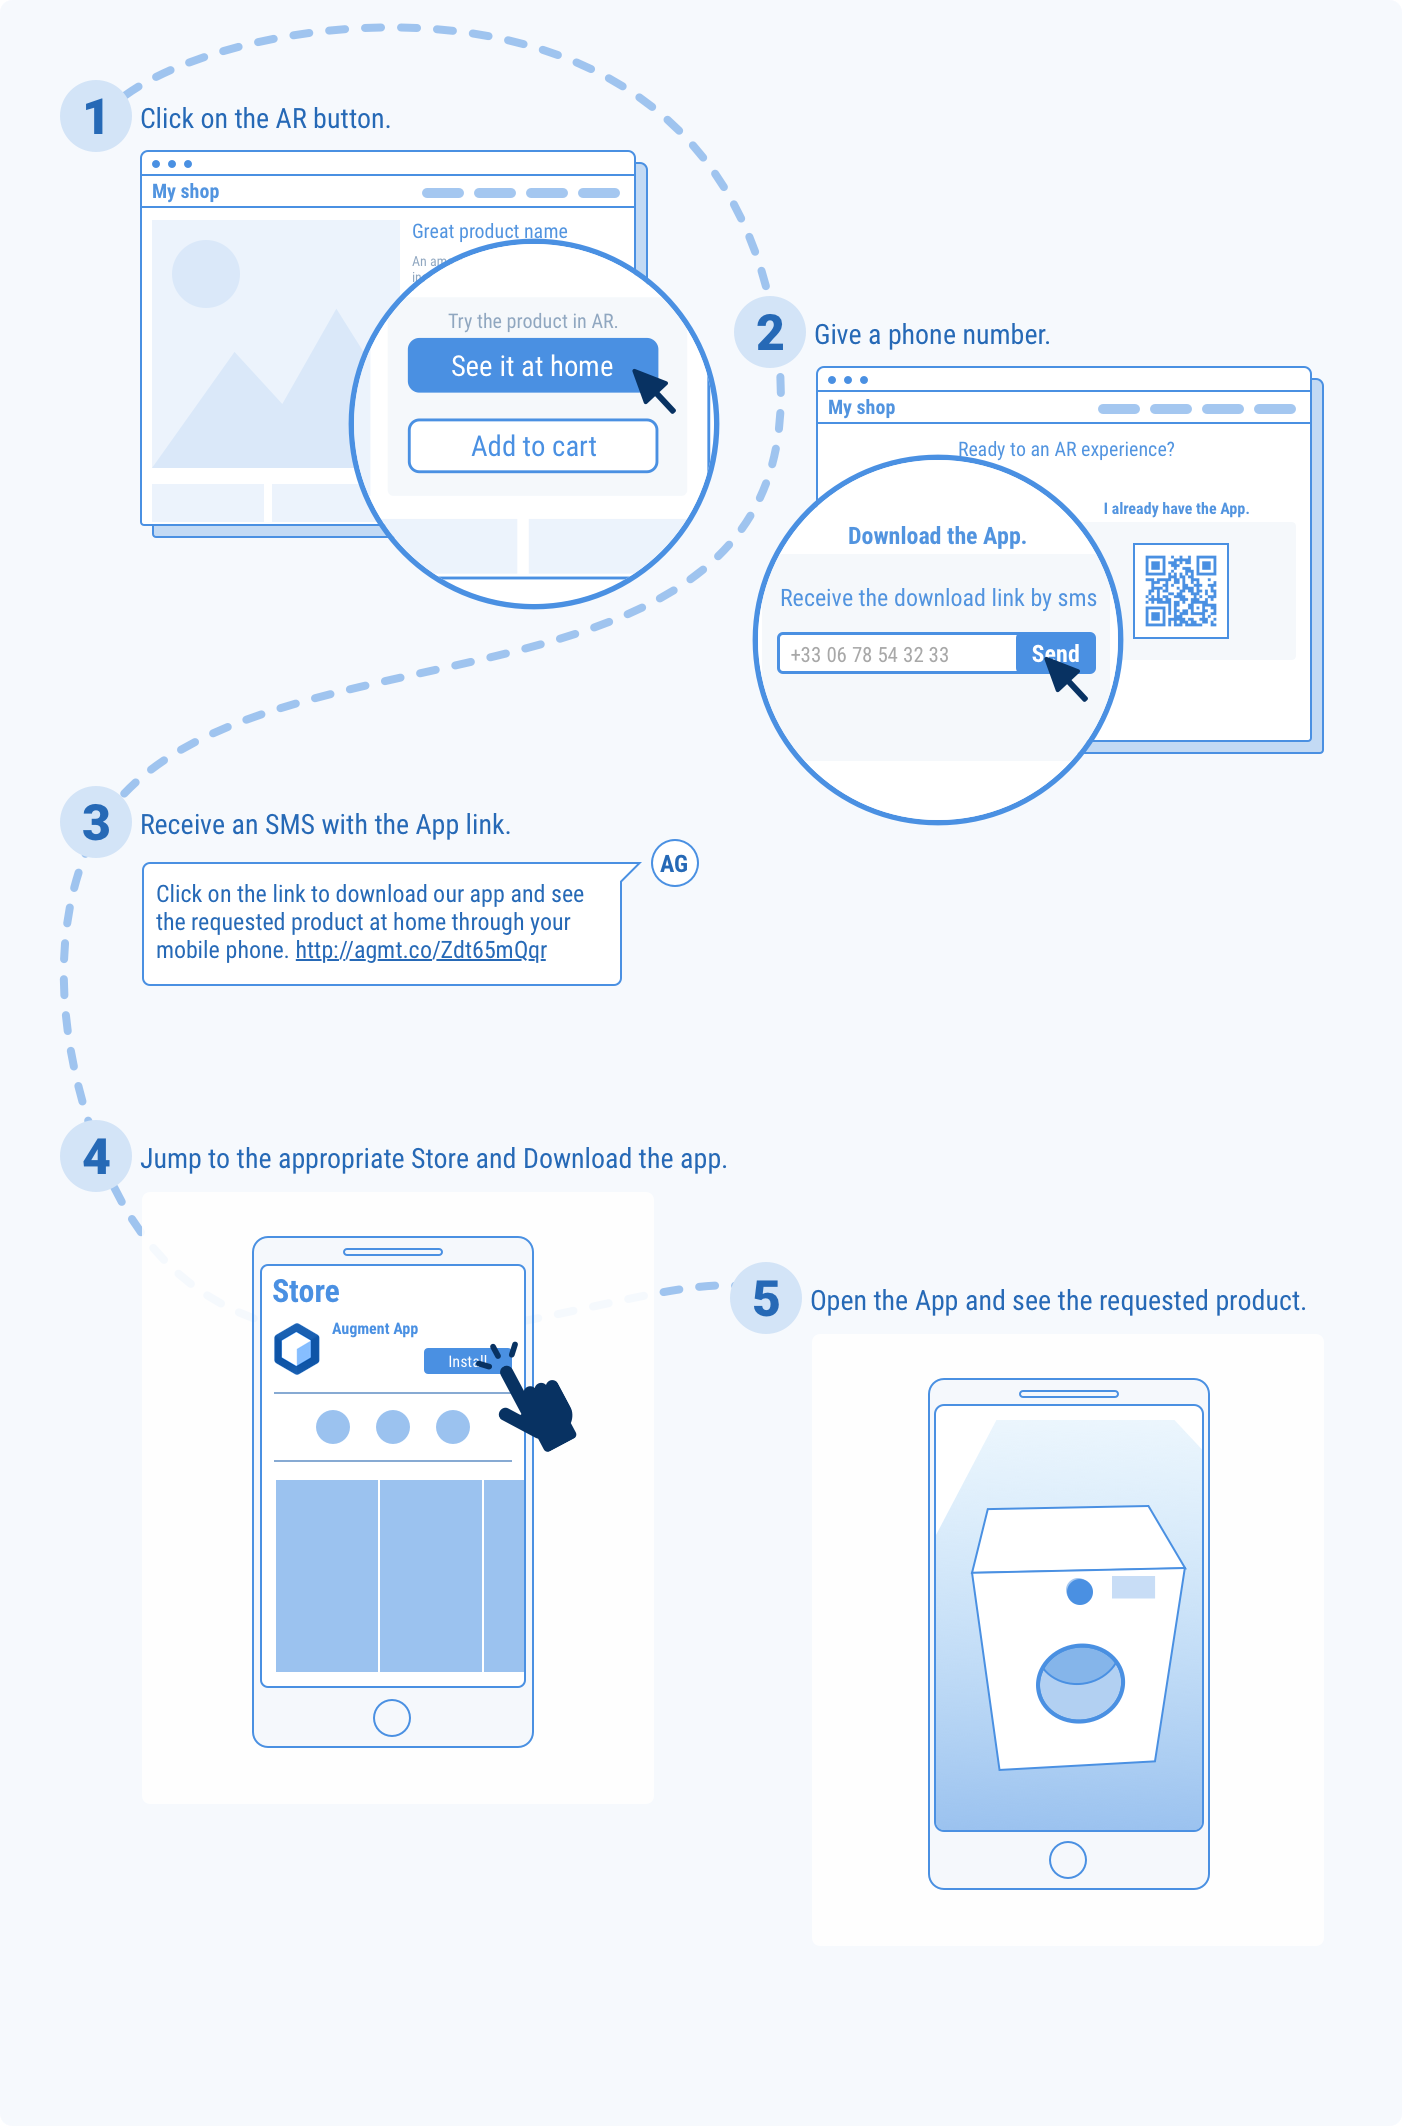
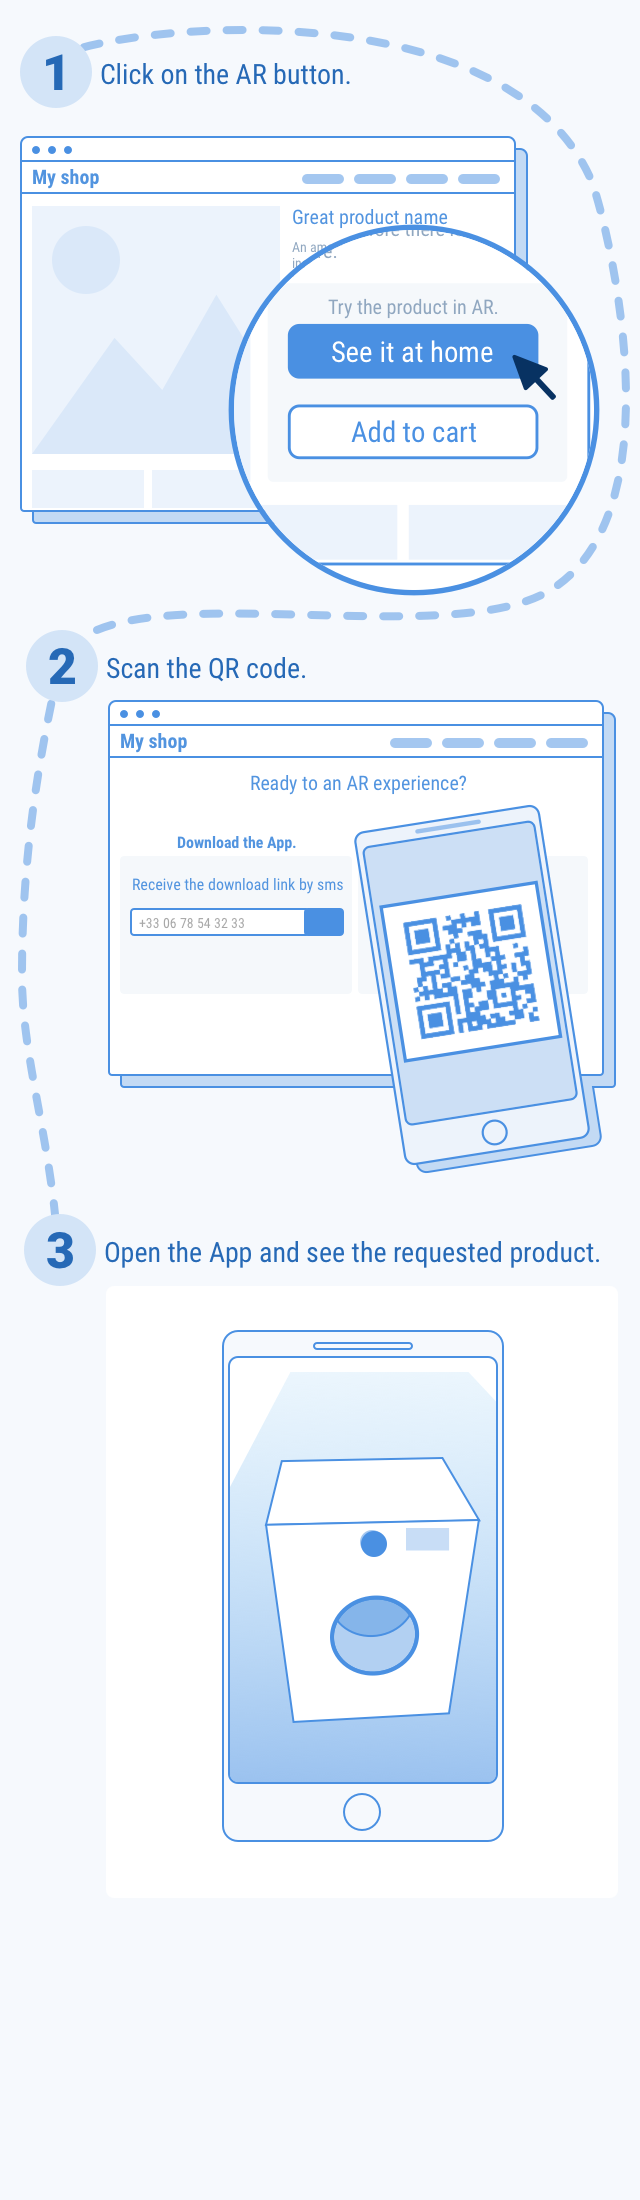
The user landing on the product page from a desktop device will first discover the augmented reality feature as the AR Button (step 1 below). As the augmented reality experience is only available through the mobile application, the main purpose of this fallback page (step 2 below) is to convince users to install and open the app to continue.
First Use
 This page’s main purpose is to allow the user to download the Augment app, that is the reason why the information needs to be clear - as we want the user to follow through.
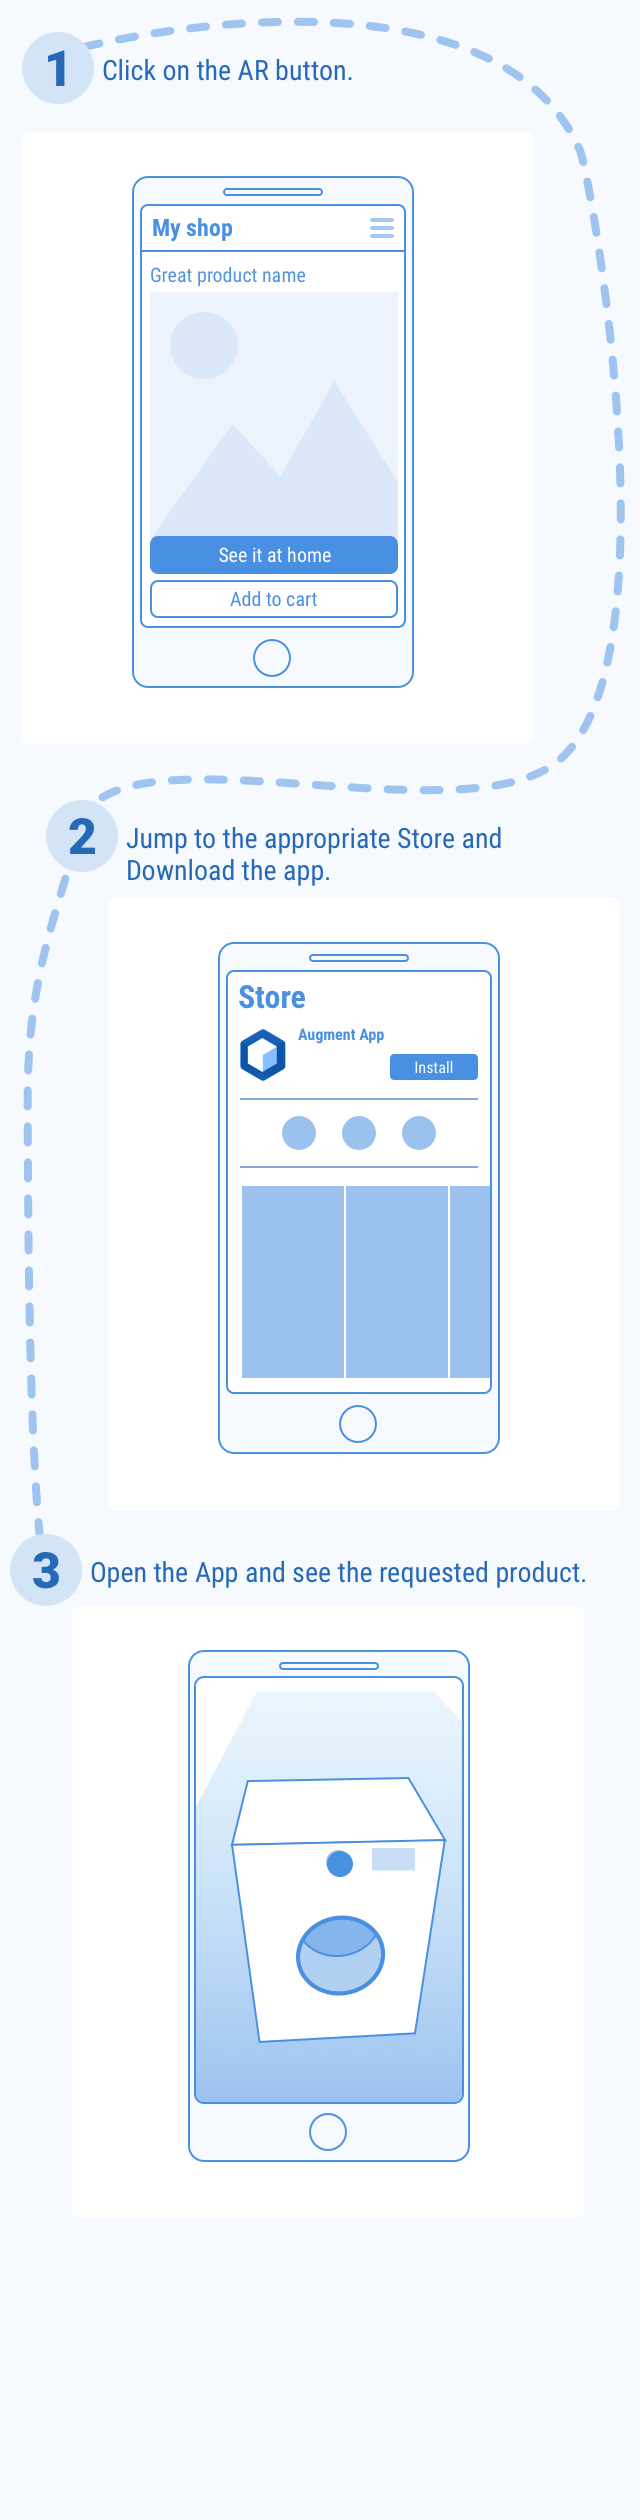
For first time users that have not yet downloaded the Augment app, it is important to walk user through the workflow in a clear manner.
- Steps 2-4: Users that have not downloaded the Augment app are prompted to.
- Step 5: Once the app is opened, the request product is available for view in augmented reality Once the app is installed, they will need to scan the QR code to view the product in augmented reality
Subsequent Use
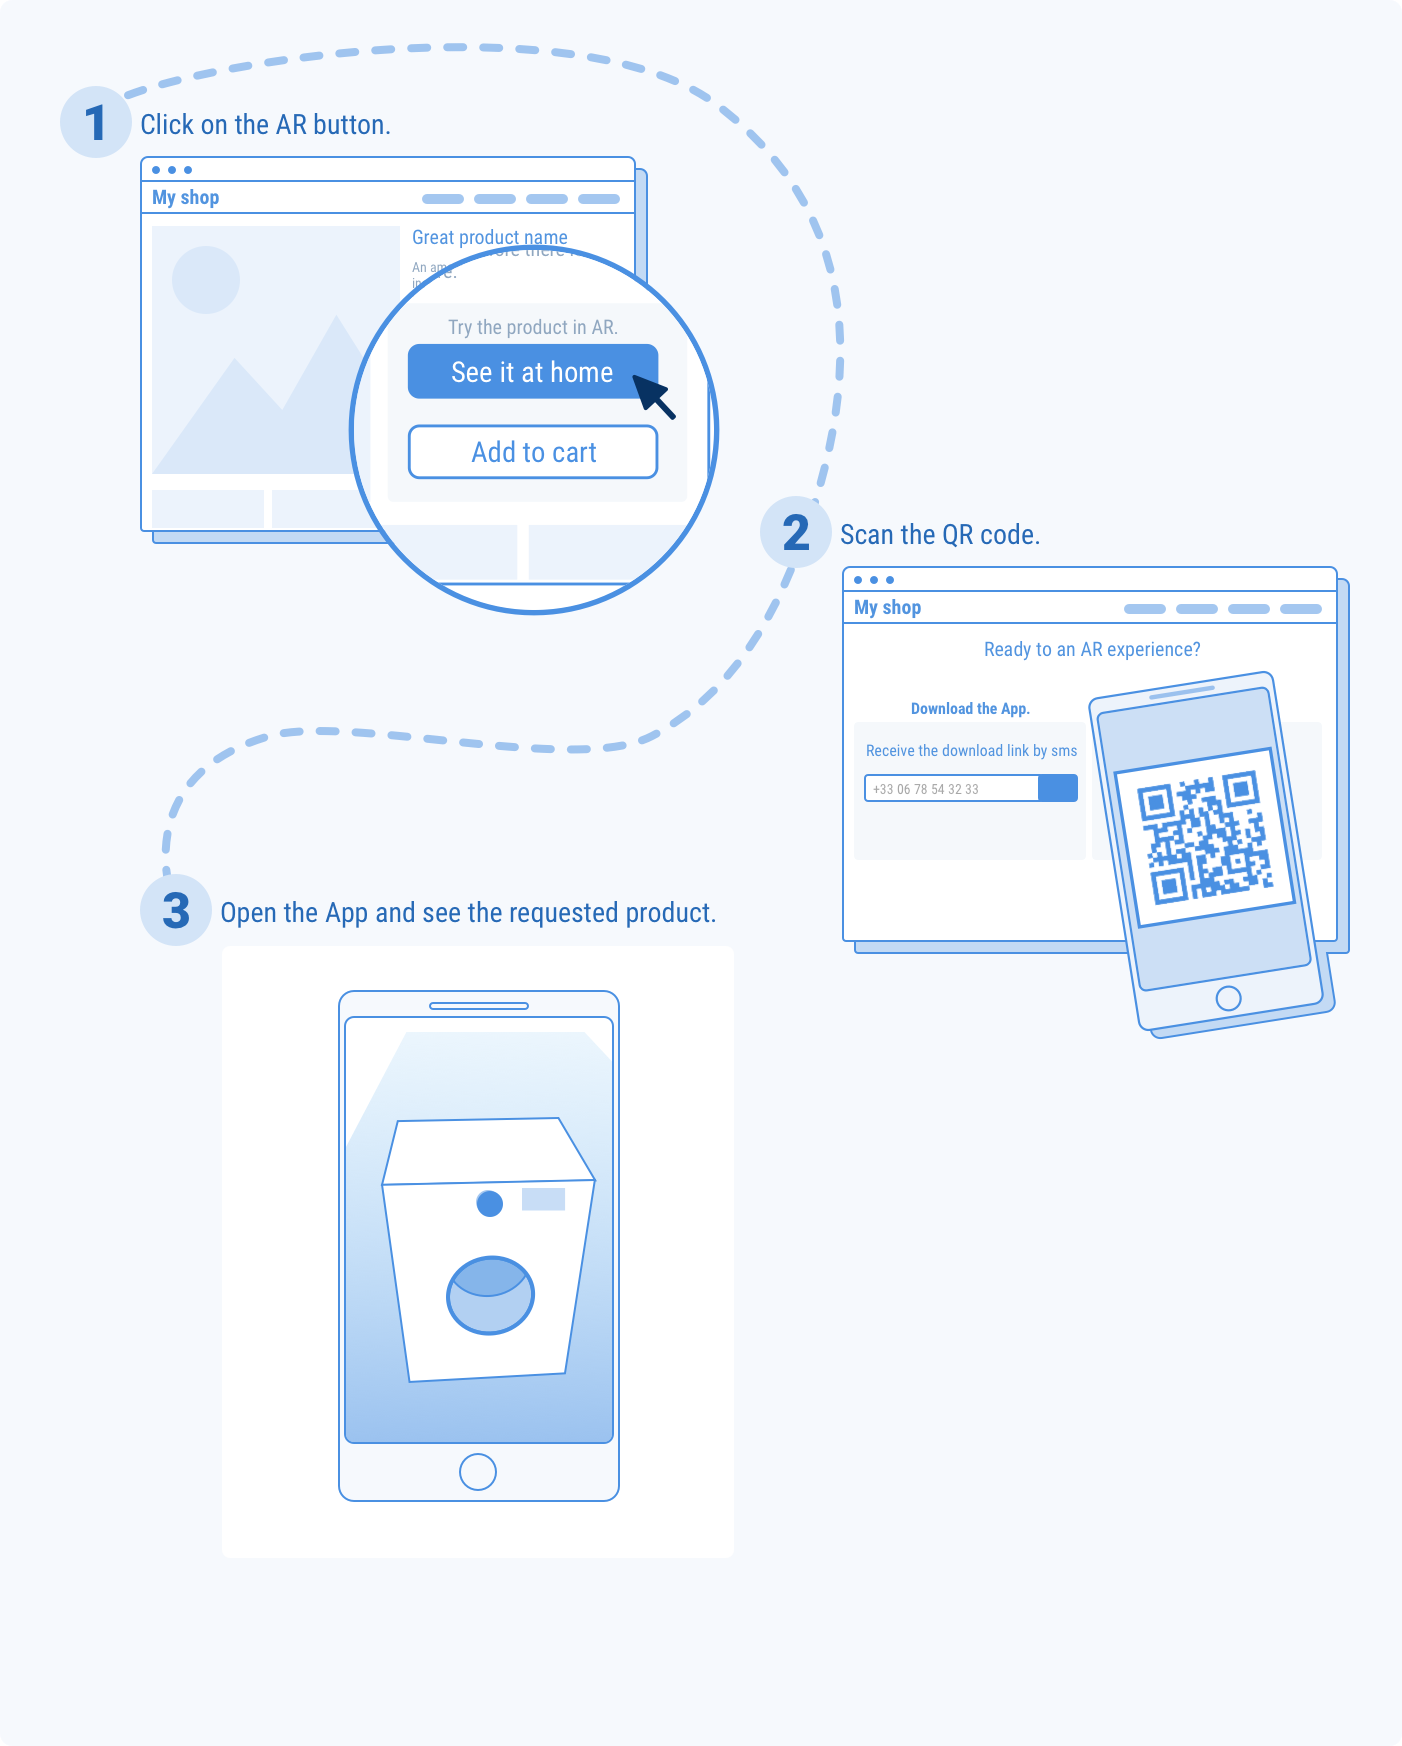
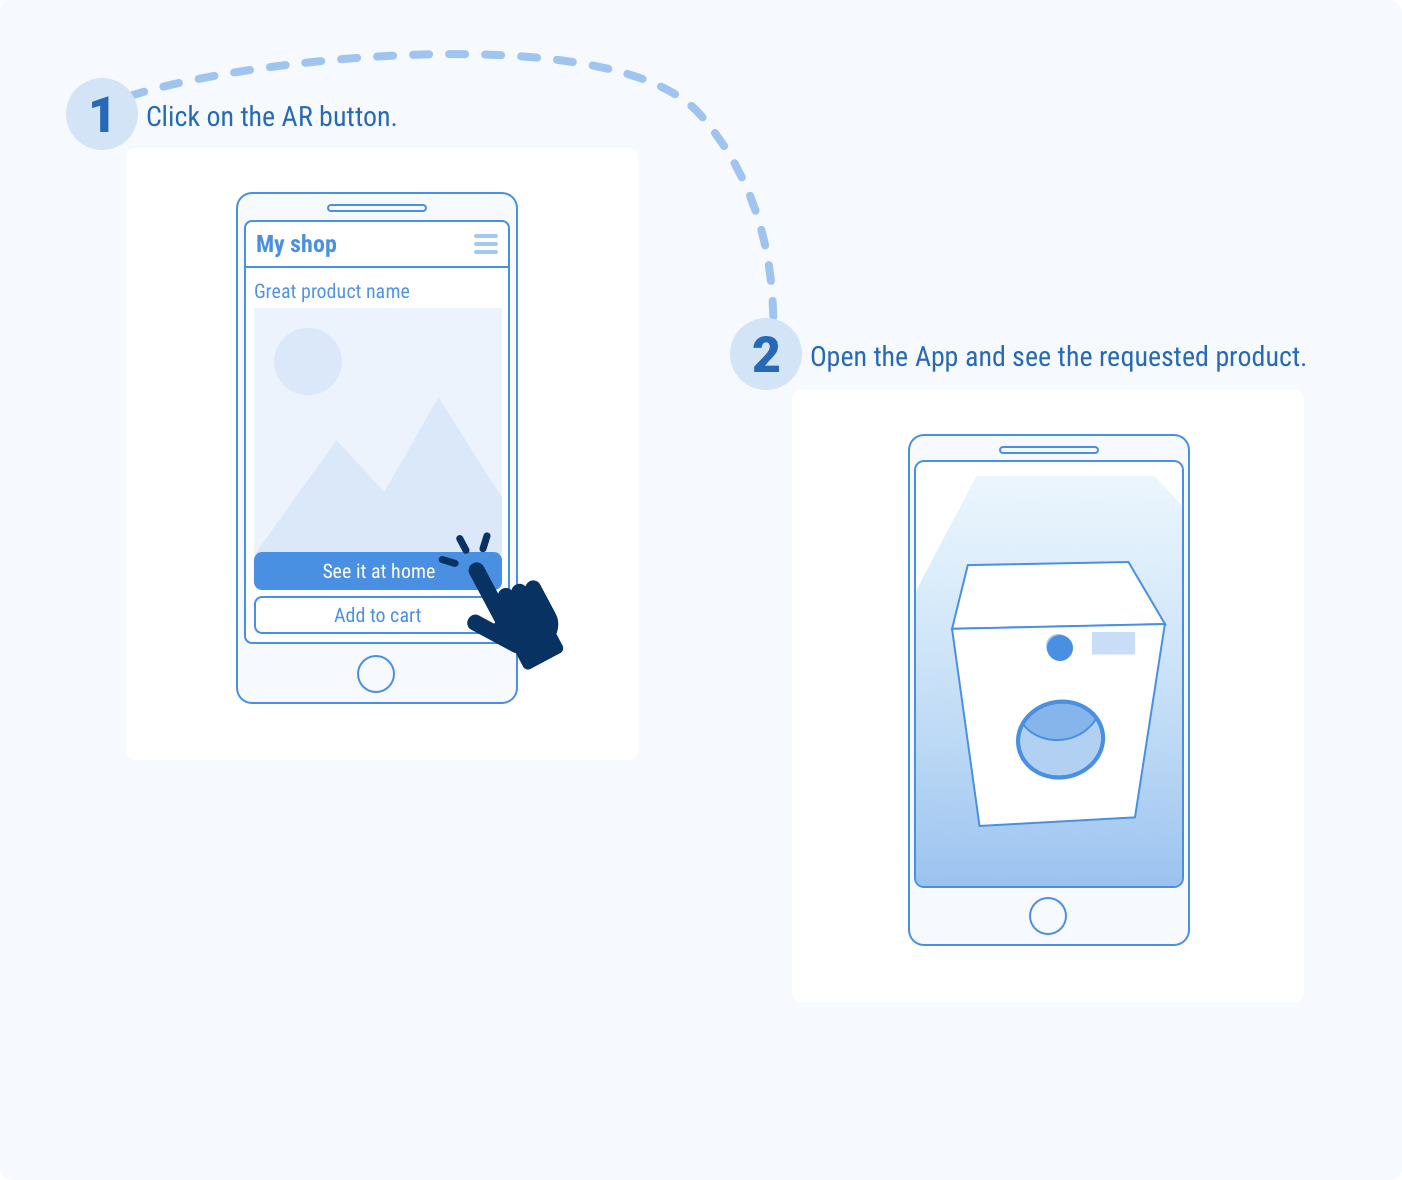
 Once the mobile application is installed, the workflow becomes faster – the user will just need to scan the QR code with the previously downloaded app to view their product in augmented reality. The user will have understood the structure, and he/she will be able to feel at ease by clicking on the SDK button.
Fallback page
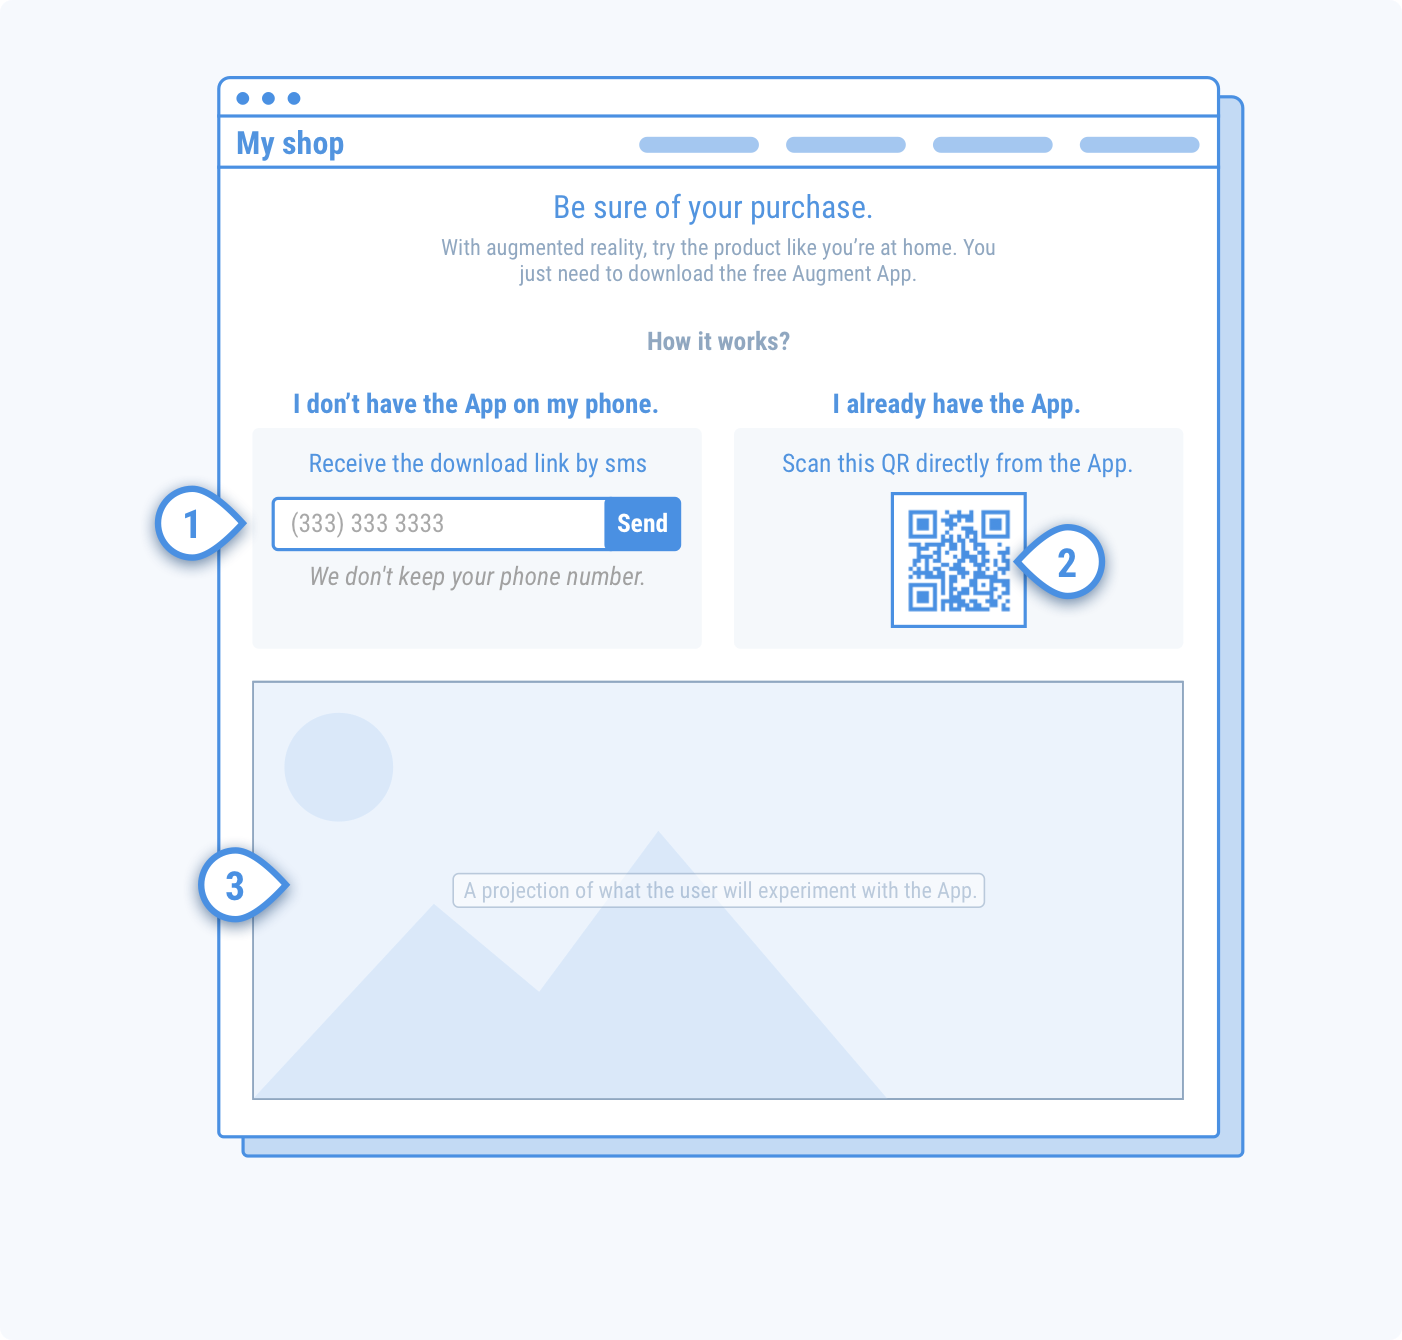
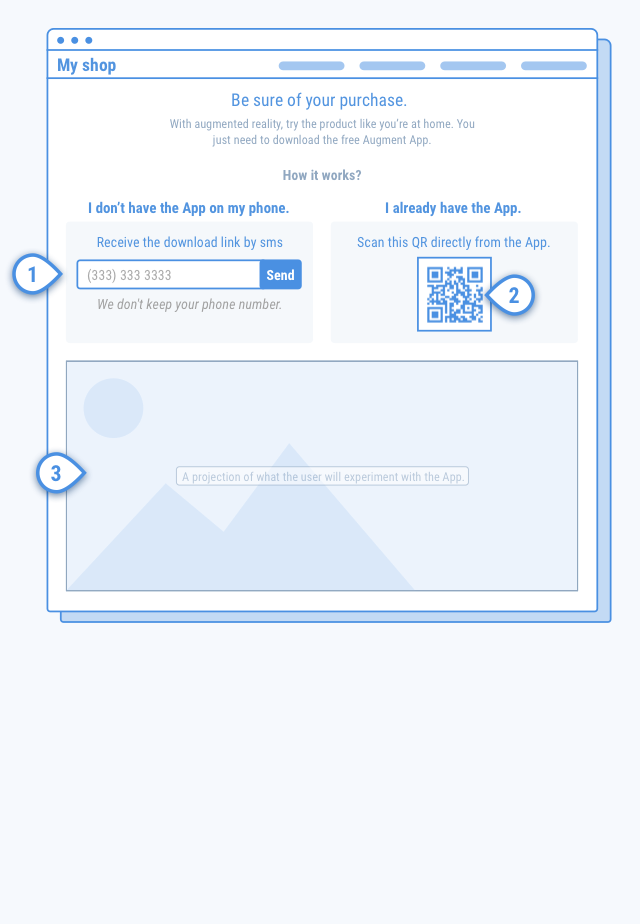
This page appears when the user clicks on the AR button on the product page for the first time. It allows the user to fully understand the experience.
It is important to take care of each item on this page, indeed, it is the page that needs to convince the users to download the application and experience augmented reality. This is the reason why the information needs to be clear for the user to complete the task.
Two ways for downloading the application: In order to bring the desktop user to mobile, our SDK allows two ways of downloading the application :
- An SMS: the user enters his/her mobile number -> receives a text -> clicks on the link -> directed to the store -> downloads the app -> arrives directly in the AR where he/she can view the product chosen on the e-commerce website.
- A QR code: the user scans the QR code with a QR code reader -> directed to the store -> downloads the app -> arrives directly in the AR where he/she can view the product chosen on the e-commerce website.
User needs
- Users need to stay on the e-commerce page, hence the reason why it is important to put the fallback page directly on the website.
- Users need to understand the experience in order to download the app.
- Users need to understand that they will be redirected to the Store when they click on the button.
- Users need to understand that after downloading the App he / she sees directly the right product.
On mobile
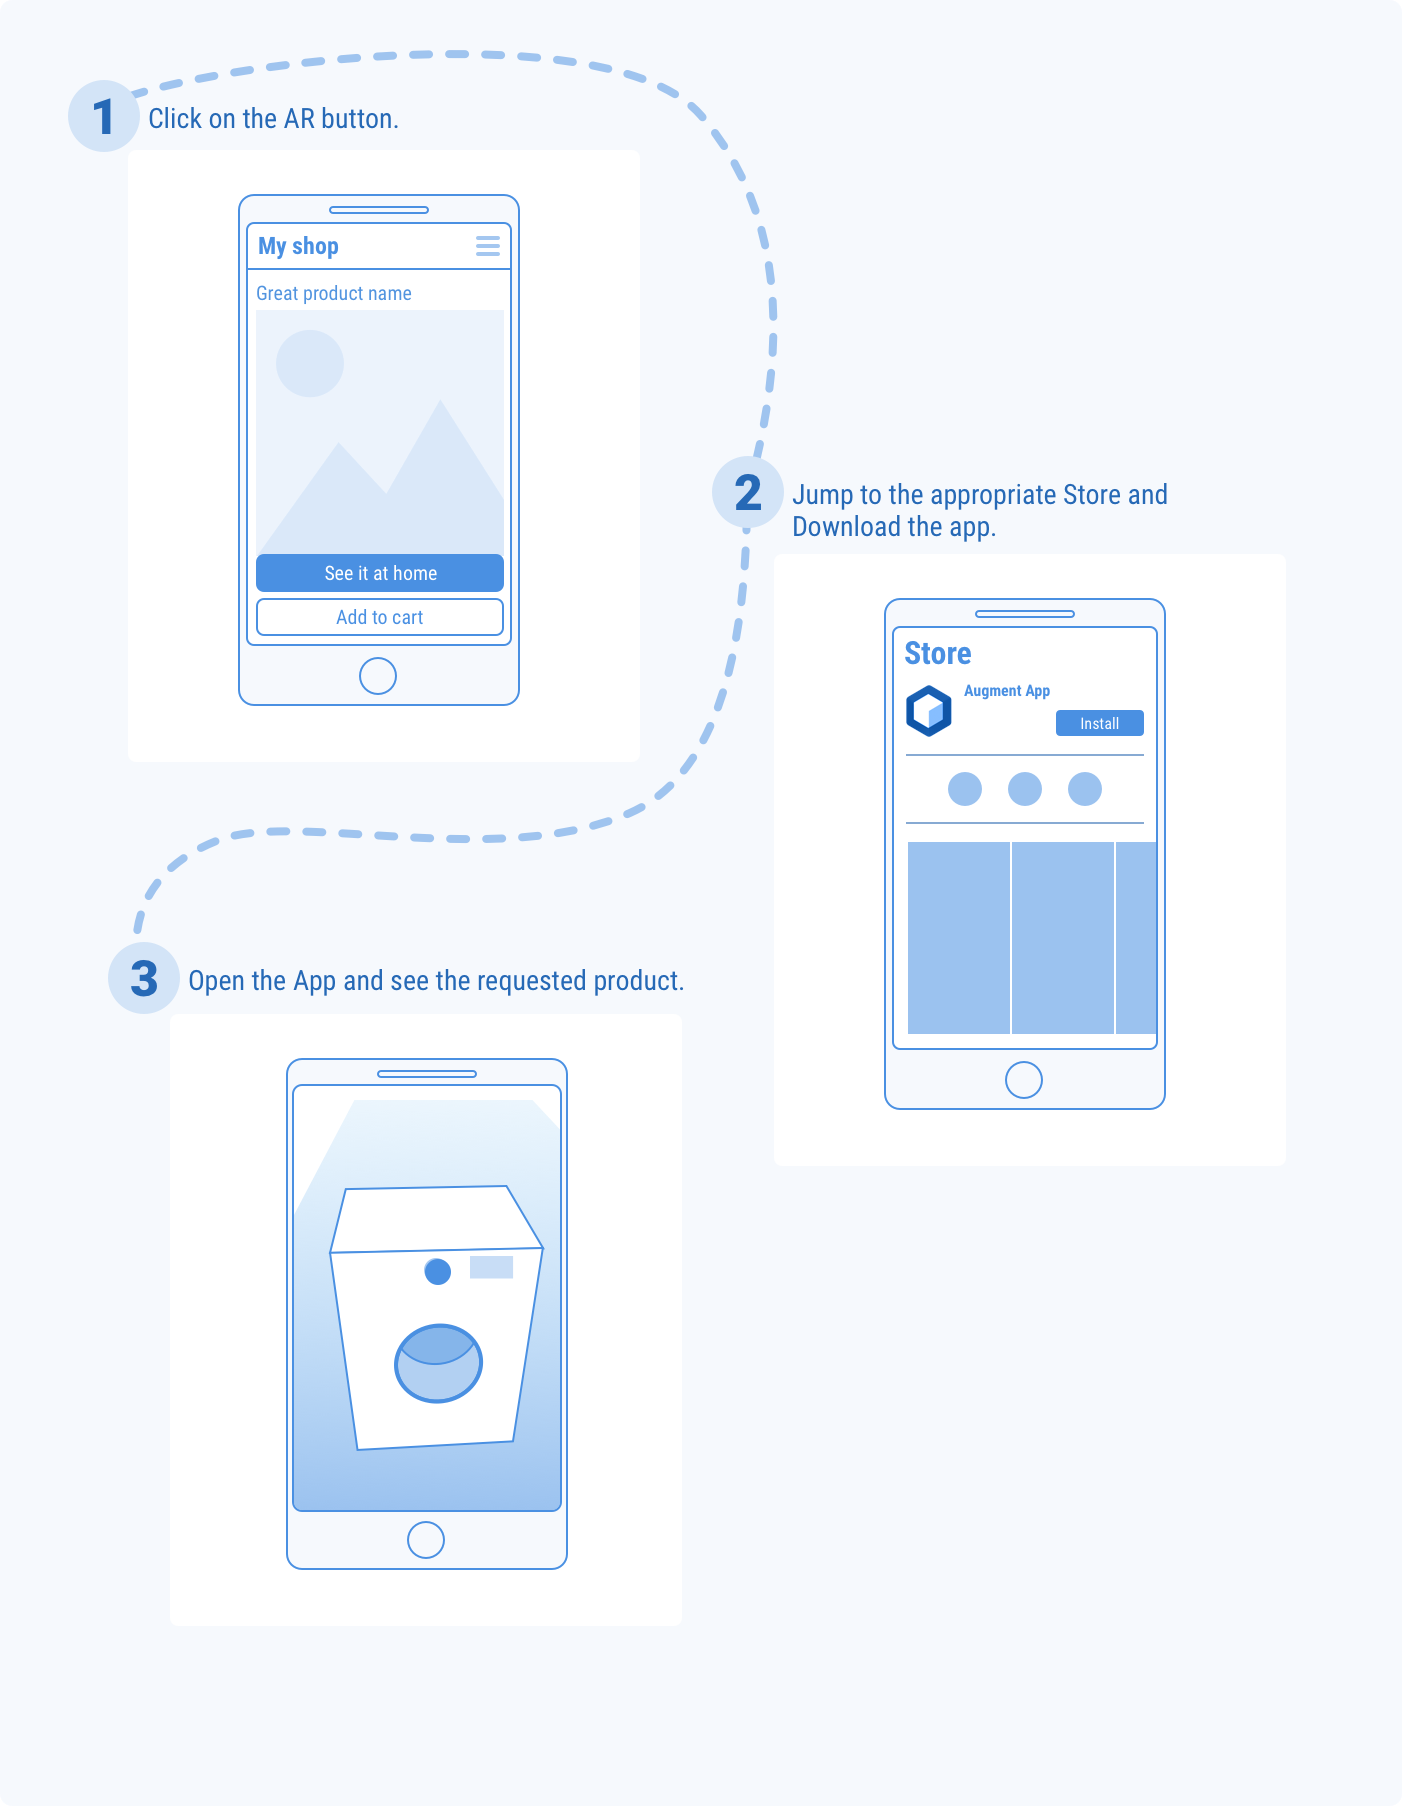
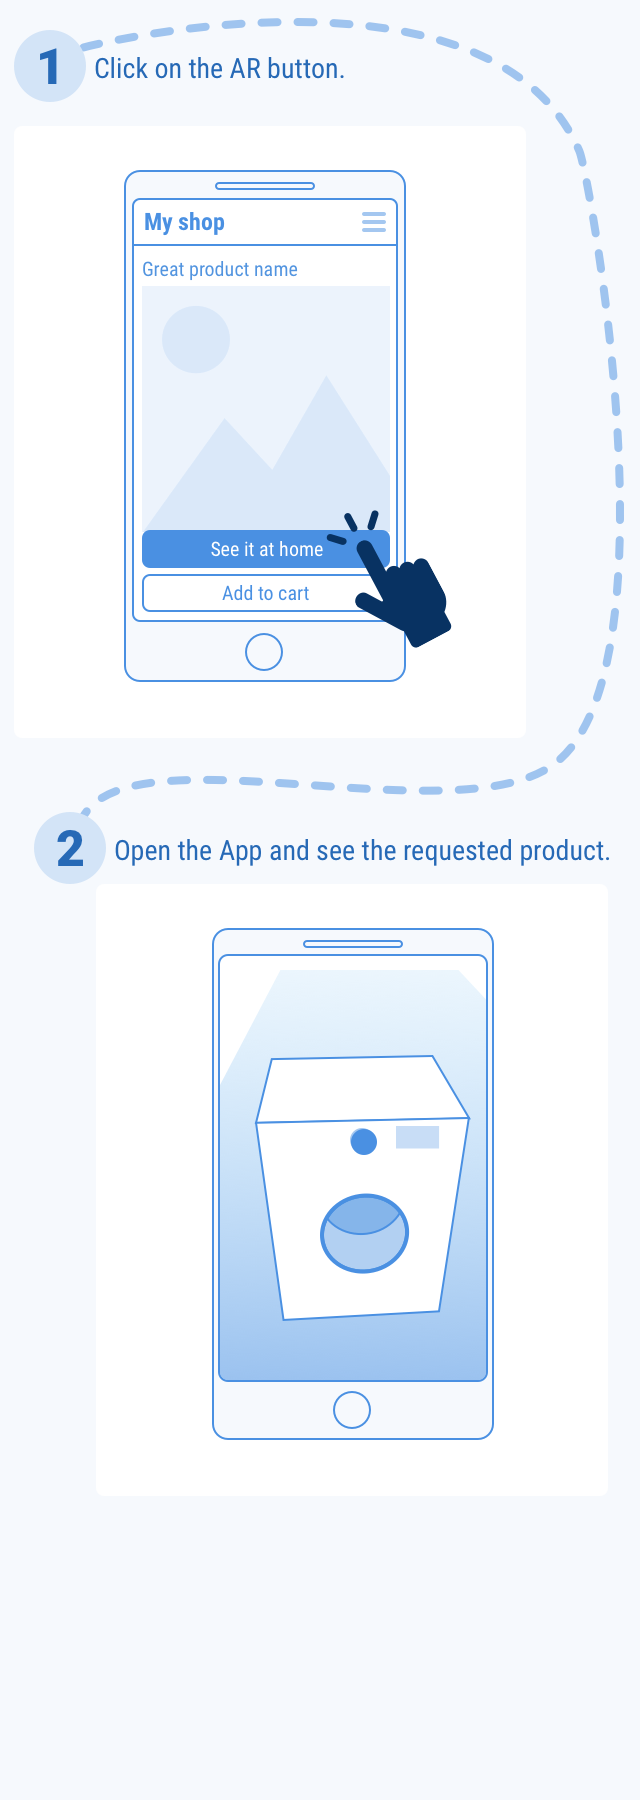
On mobile, as with desktop, the user will first discover the augmented reality feature as the AR Button (step 1 below). As the user is already on a mobile device, there are fewer steps to product visualization than on desktop.
First Use
Subsequent Use
UX Recommendations
The following user experience (UX) recommendations are to accompany the user journey described in the previous section.
Product Page
AR Button
The AR Button is the entry point for the user towards their augmented reality experience.
The first look at the button is a decisive moment as the user needs to have the will to click on it. Think about the way you present this button, its position on the product page, the tagline. Think about the way your user acts. Ask yourself what kind of strategy you can put in place to raise your user’s curiosity and to encourage him/her to click.
The following recommendations will depend on your website structure and the way you strategically organised your information. The following are general guidelines that will minimise user effort and increase their attention.
Location
Near the “add to cart” button:
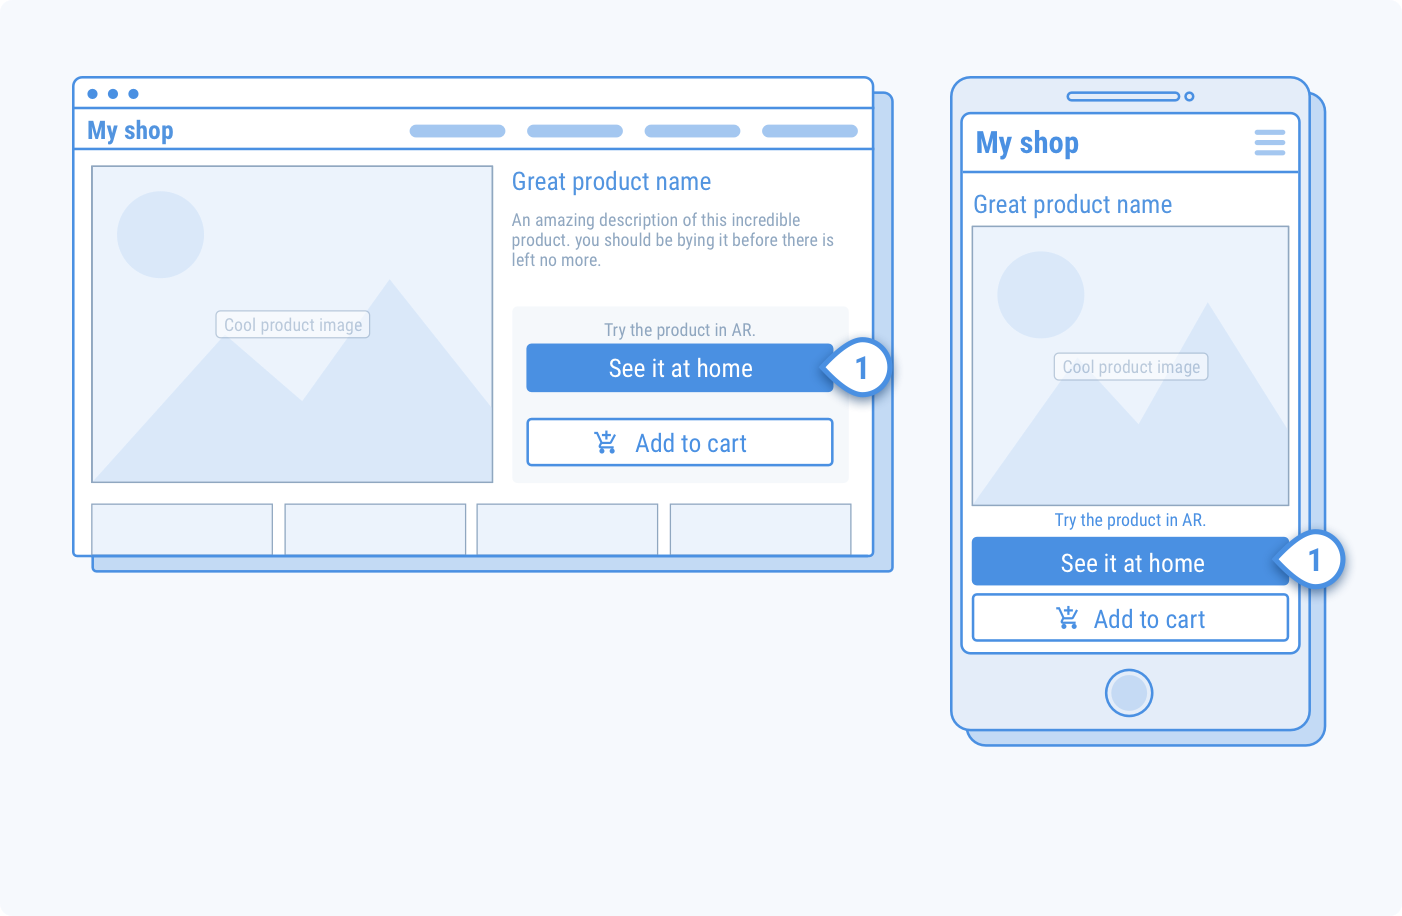
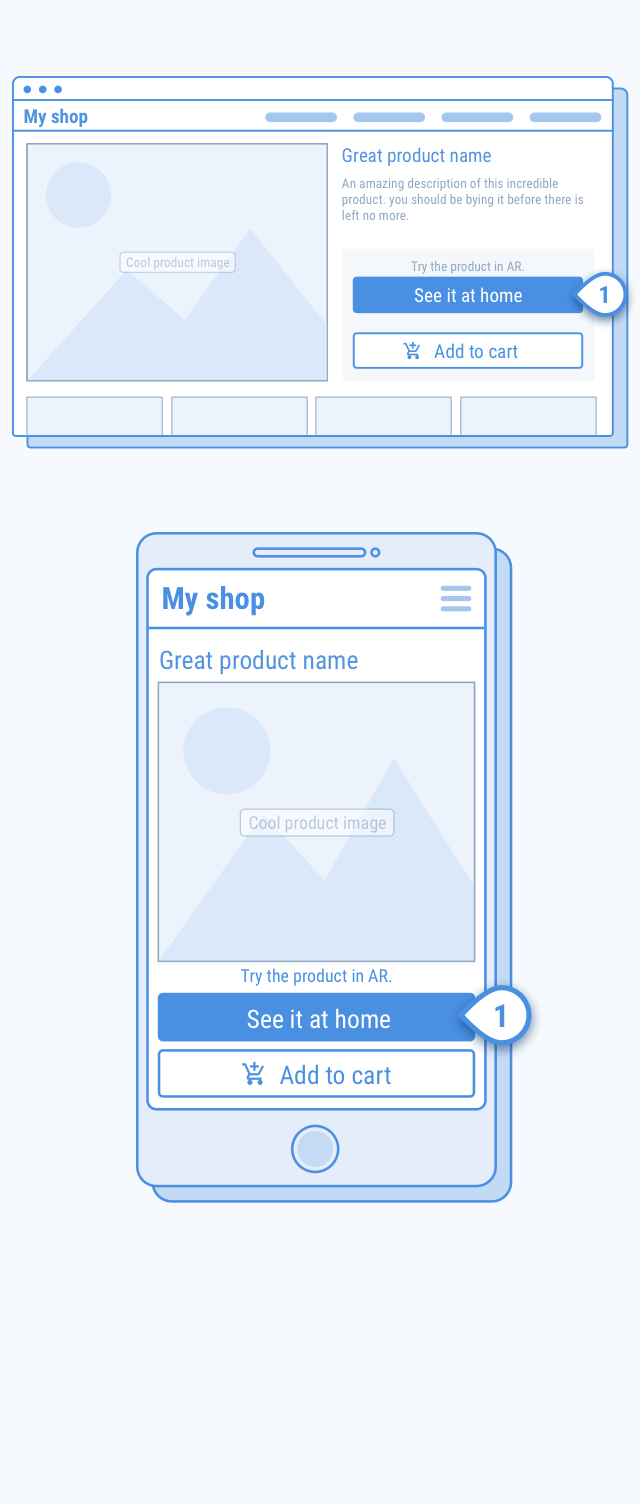 Place the AR button at a strategic and visible place on the website so that the user can see it instantly.
Positioning the button close to the “Add to Cart” button allows the user to have two complementary actions side-by-side. It will also serve to reassure users before purchase, as presenting the actions in chronological order implies:
- Make sure you are making the right purchase by visualizing the product in augmented reality at home.
- Add to cart.
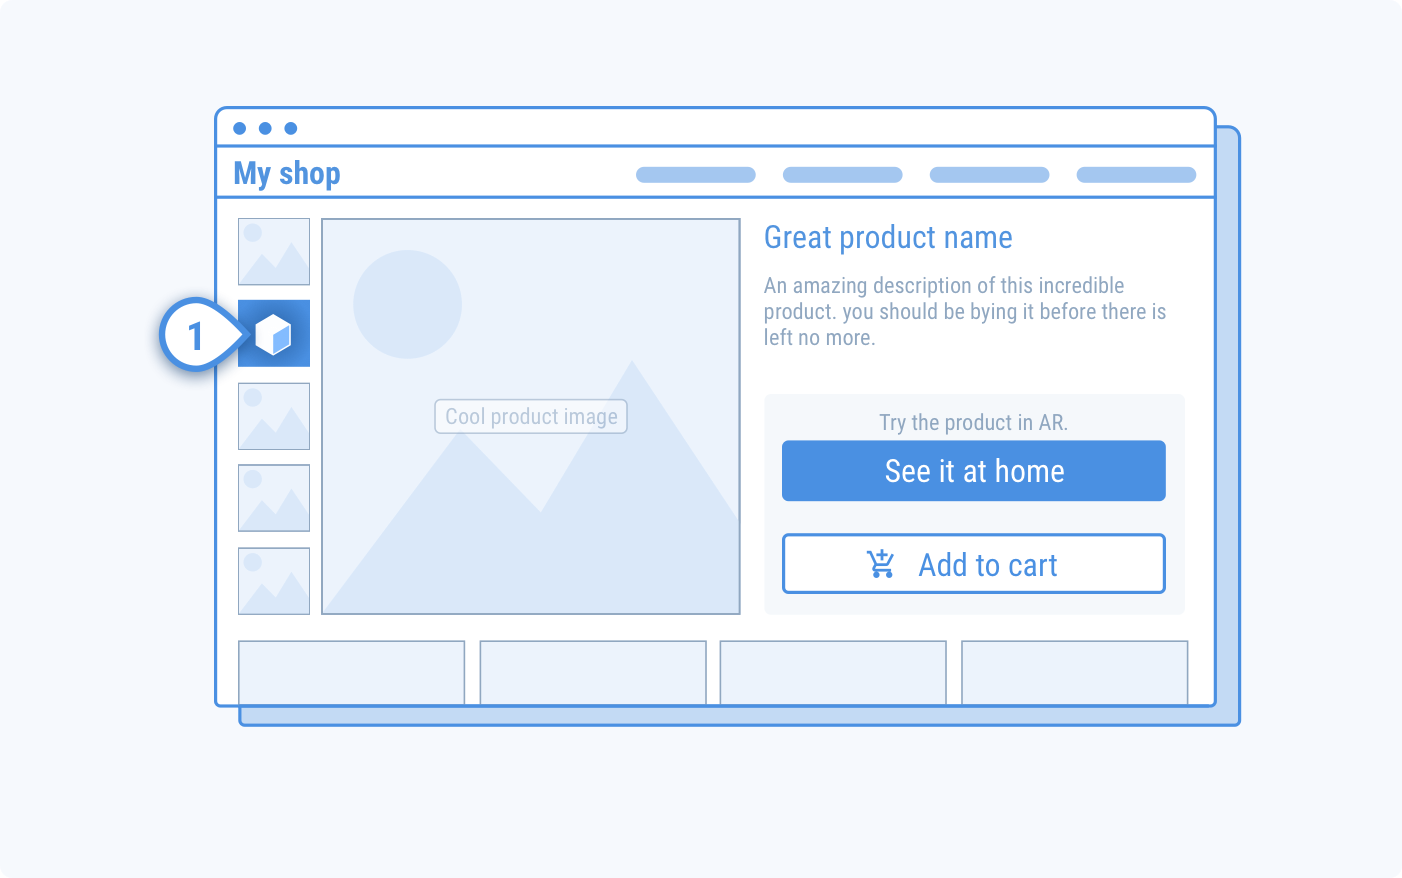
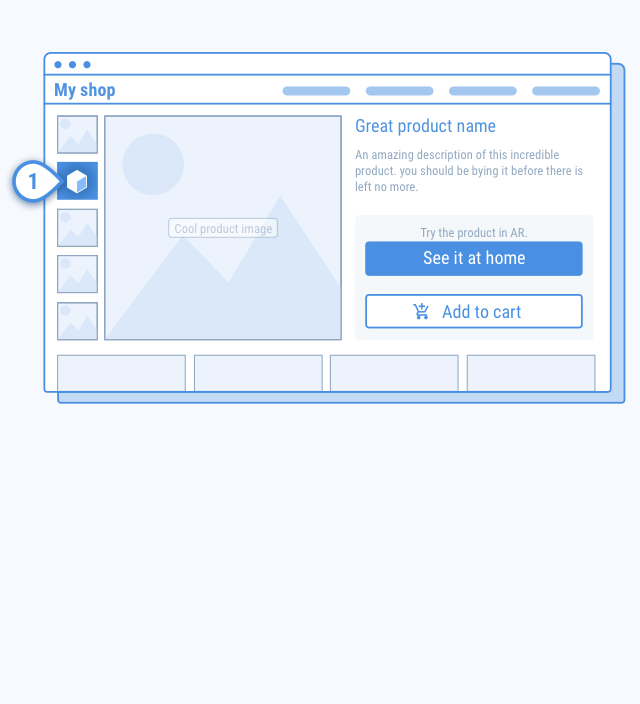
In the product thumbnails section:
Wording
Don’t forget that even the concept of augmented reality is still rather abstract for a great number of people and that wording on the web is a complex subject that requires expertise. On the web, users have a fast and diagonal way of reading. They don’t take the time to read the textual content and react better to visual content as well as to main actions suggested on the interface, like buttons. That is the reason why the information needs to be clear and concise, otherwise, you are taking the risk of it being sidelined. With this in mind, we recommend being straightforward, to offer concise wording and simple vocabulary to your users. If you fear that the information will be too technical, don’t be afraid of adapting your wording.
Users react positively to catchy titles that highlight added value of augmented reality. This type of approach arouses curiosity and reassures by underlining the idea that testing the product before buying reduces mistakes.
- Try at home
- View at home
- See it live
Exclude too technical terms like: 3D, AR.
Try to give small explanation next to the button: In order to help the users understand the button’s purpose, we recommend putting a small explanation next to it. It needs to provide additional information to the user who, at this stage, can wonder what that new button means.
Please find below a non-exhaustive list of sentences you could use:
- Try the product at home before buying.
- Want to see how the product look like at home?
- Visualize the product in augmented reality.
Where to place the explanation?
This short explanation placement needs to be visible and clear for the users to see it at a glance. It can be presented in various ways, for example :
- Pop-up bubble: it is an interesting way of presenting the explanation to users. The information bubble appears temporarily and catches the eye towards the action. It is a way of introducing new information in a strong and visual way. You can also choose how long you want to display the information bubble.
- Button title: you can also choose to present in a more conventional way by adding a title close to your button on your interface. Again, its placement will depend on the way you wish to present the information: you can either highlight the button or the title.
Technical limitations
All requests made to Augment’s servers are sent asynchronously meaning the home page won’t be slowed down. Therefore, the necessary information needed to display or hide the button will be available a few milliseconds after the page has been loaded. In order to work around this limitation, several options are possible, but we highly recommend the following one: The button is not displayed and only appears when the information is available. A transition between the absence/presence of the button could be considered (for example a transparent to opaque gradient).
Augmented Reality
The following provides recommendations and guidelines to accompany Augment’s Mobile SDK and help you provide your users with a seamless user experience so that they can be on their way to successfully visualizing your products in their environment.
Before we get started, it is important to understand what you are integrating, its scope and its specifications:
Augment’s Mobile SDK provides an easy way to integrate product visualization into any mobile application. When integrated in a mobile app, the SDK is responsible for the following: the augmented reality (AR) view, the camera feed, the product rendering, placement and anchoring, and the interactions with the product.
The Mobile SDK also provides all the functions and callbacks to develop logic and user interactions so that your company can keeps its branding as well as the look and feel of the application. You are therefore responsible for the 2 dimensional user interface (UI) elements displayed on top of the AR view and interactions. All the illustrations in this document that contains 2D UI elements on top of the AR view are suggestions they can be taken as is, or changed and adapted to the application’s branding.
In addition, the capabilities of your users’ mobile devices vary – some may have the latest iPhone X but others may have a much older device. Augment’s Mobile SDK is adapted for such variety and therefore goes about enabling AR viewing in 3 different ways, or what are called ‘tracking methods’. Tracking methods are responsible for the intake of real time positioning and orientation of the device in relation to its environment and virtual product placement.
- For devices compatible with Apple’s ARKit, ARKit is automatically used for all product placement.
- For all other devices, Gyroscope tracking is used for products placed on the floor.
Getting Started Tutorial
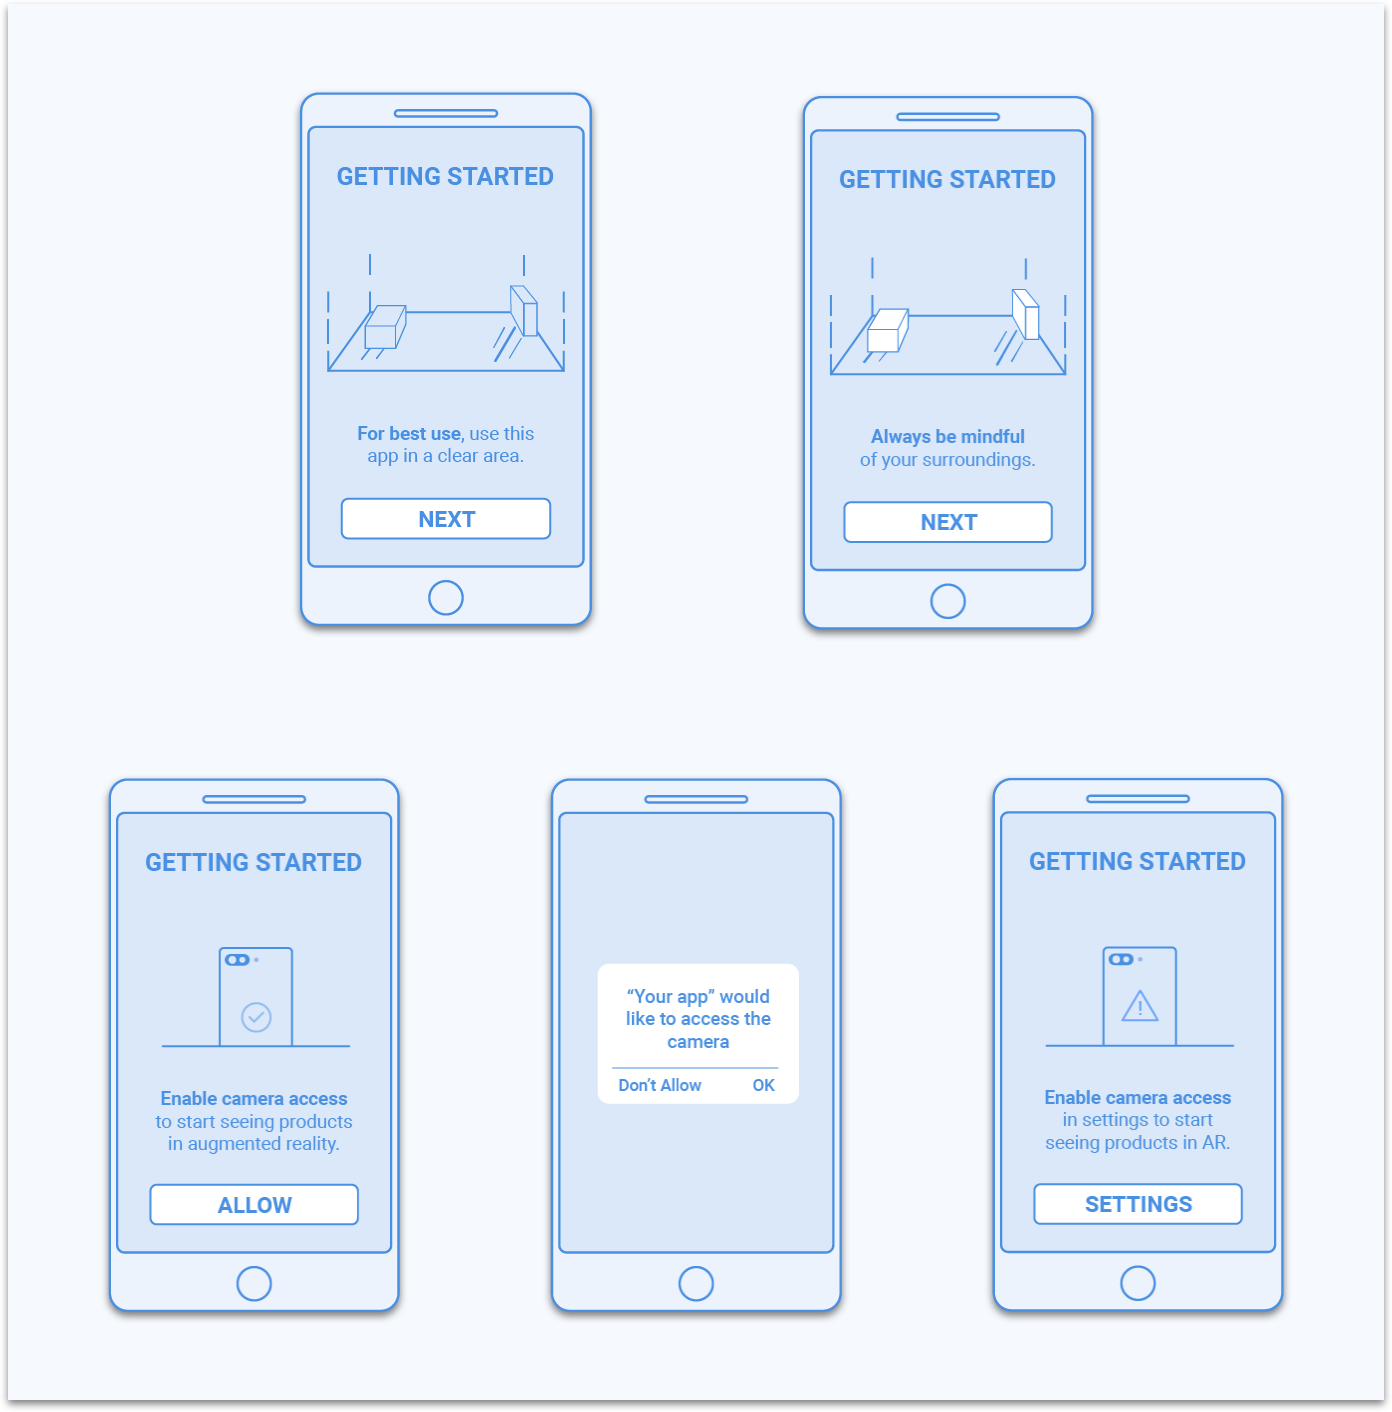
Regardless of the tracking method used, it is good practice to inform the user about the conditions of use through a short tutorial before (s)he begins the augmented reality experience. Any usage beyond those conditions may lead the user to misunderstand the placement or realism of the product in their environment or even their entire experience and the outcomes that the user could benefit, resulting into a poor first experience and no other usages of the functionality. The tutorial should be displayed only on first use, and we recommend the following 3 steps:

Tracking with ARKit
Product Placement:
ARKit allows the user to place and anchor the product on any detected horizontally flat surfaces. For a successful experience the user must follow a multi-step process. This process should walk the user through the exploration of its environment, the detection of surfaces and the placement of the product at the desired location:
Initialization and Exploration of the Environment
Initialization is an unavoidable step when using ARKit but it only lasts a couple of seconds. While the user is unable to do anything during this process, it is easy to have this process go unnoticed by the user – invite the user to get started with the exploration of the environment.
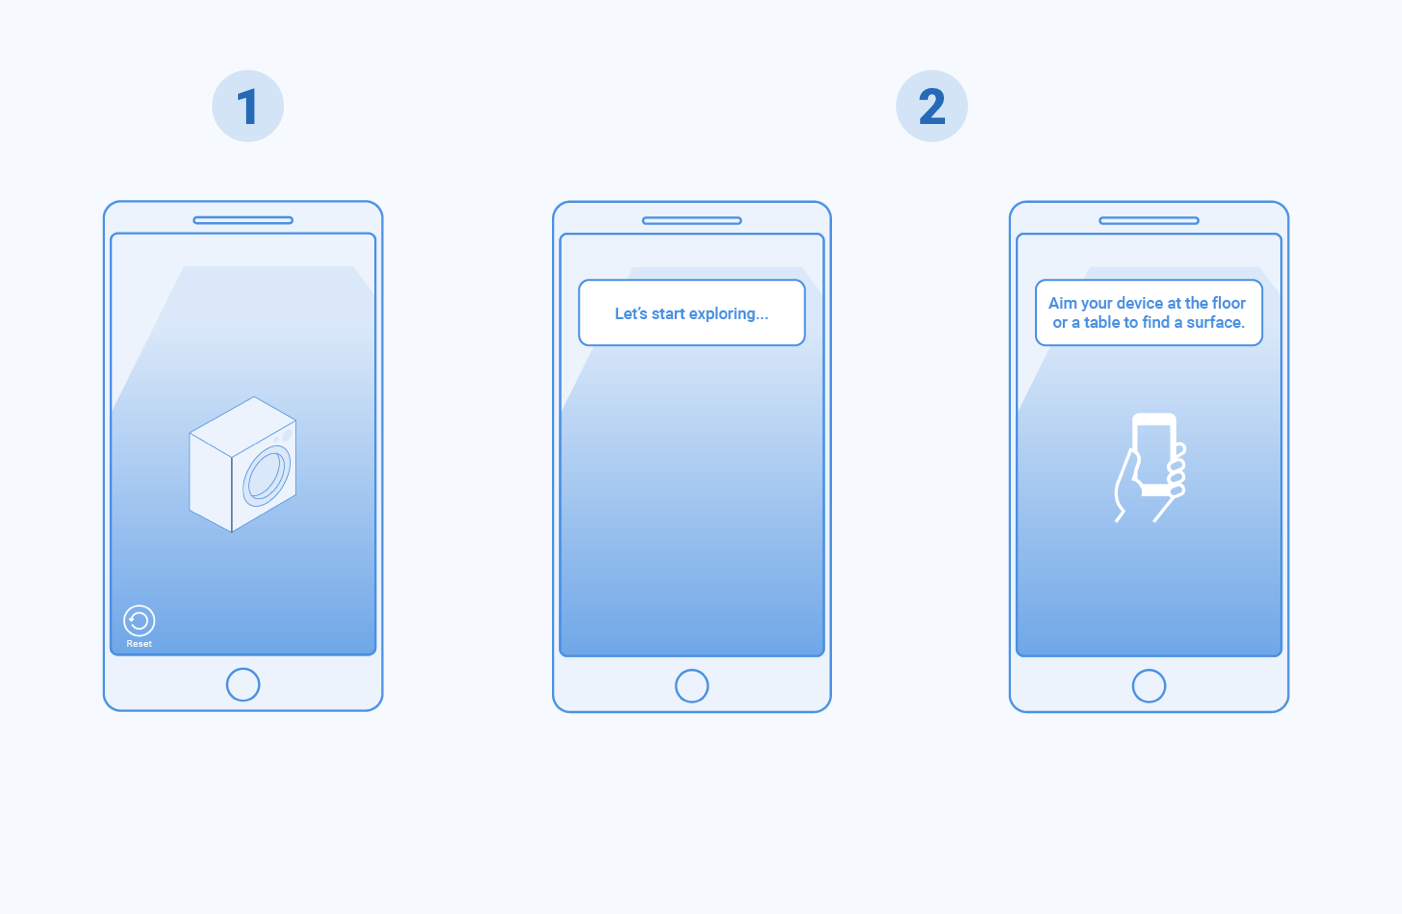
The first and main goal of the user is to directly view a product at the desired location. It is not to understand the functionality behind the augmented reality at work. For that reason, it is important to keep all instructions goal-oriented (either in detecting surfaces or placing products) instead of purely providing explanations. Invite the user to start exploring its environment and to aim the device to the floor or table to let the device detect a surface where to place the product.
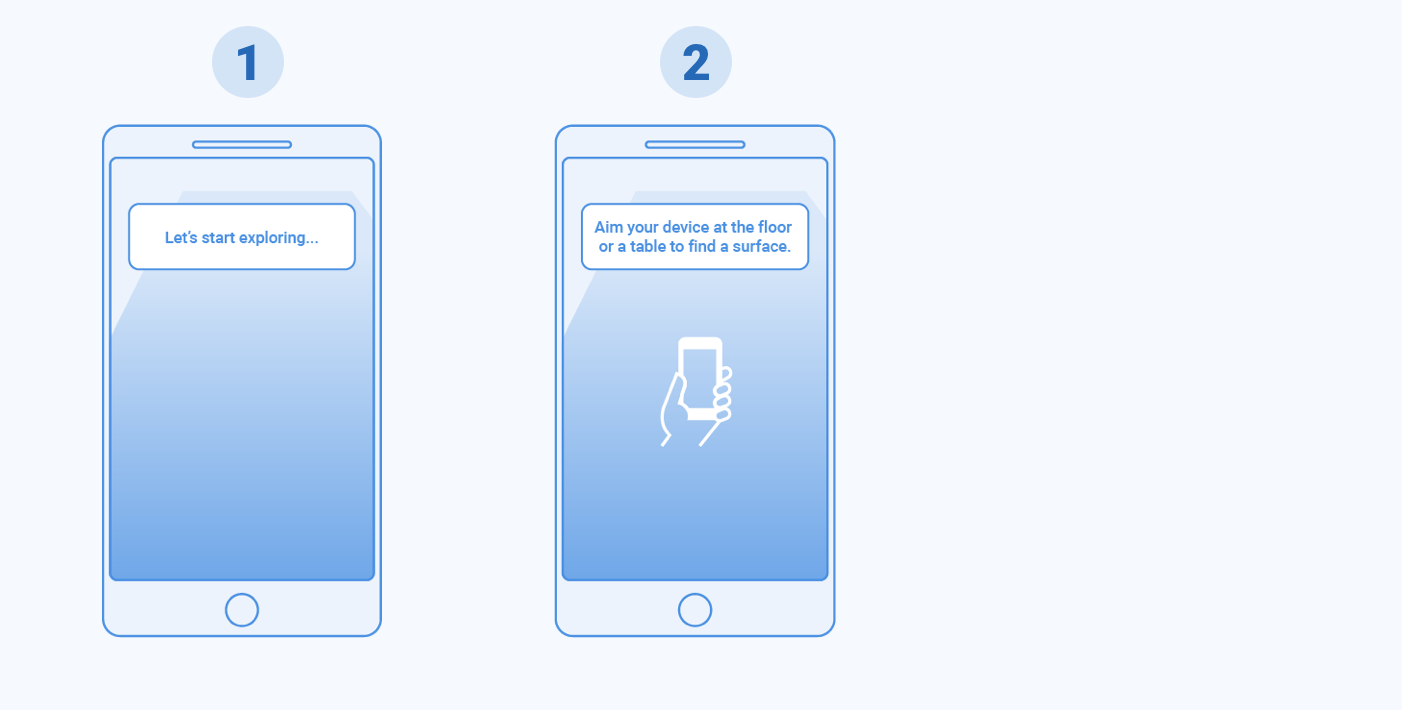
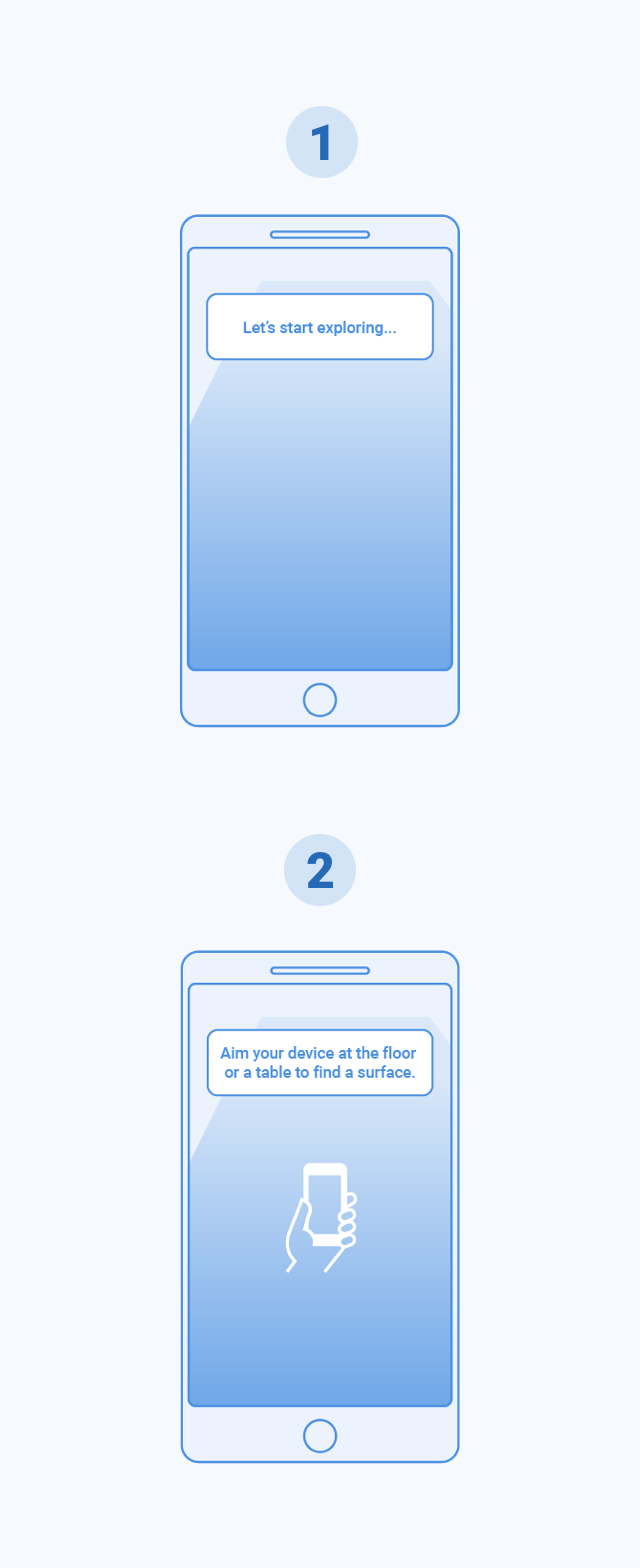 1 - Invite the user to start exploring its environment.
2 - The hand holding a phone is animated (sliding left and right) to let the user understand what he needs to do.
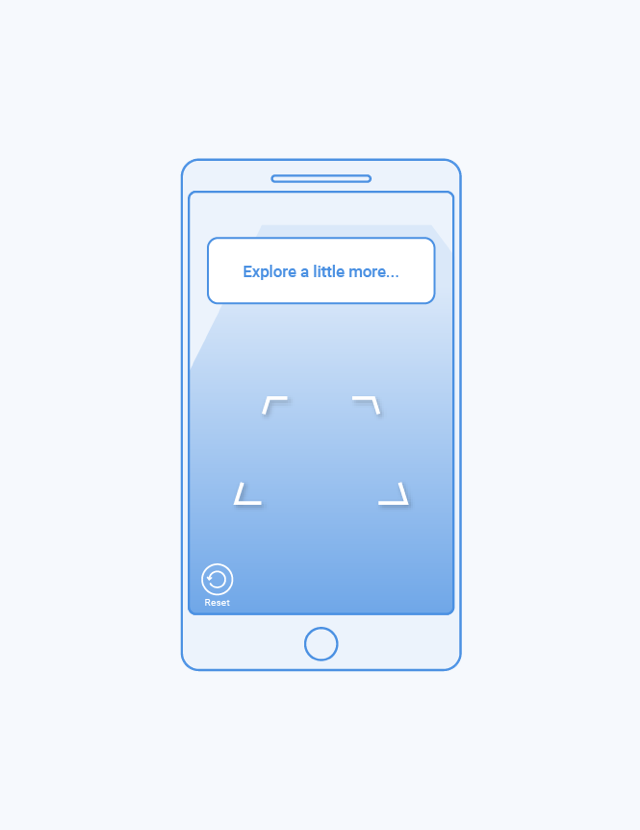
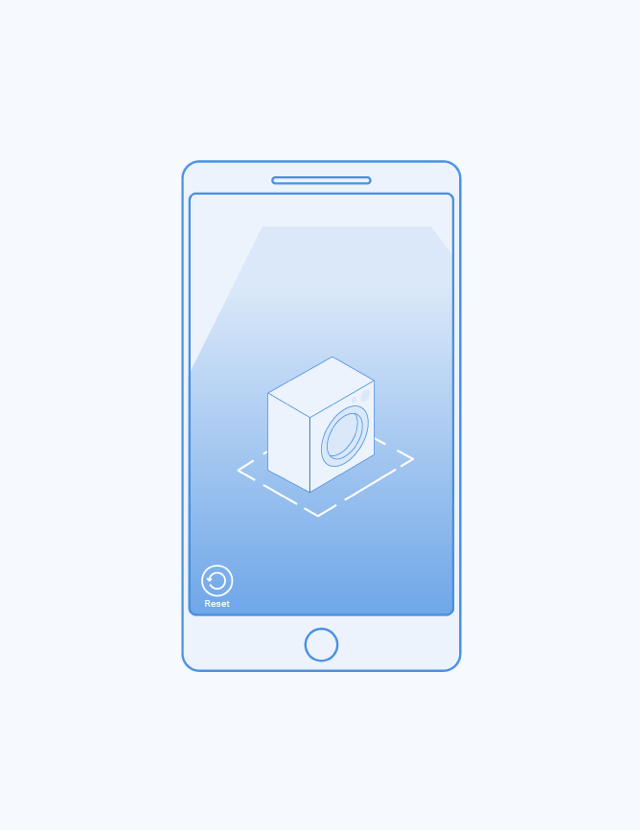
Surface Detection
When a surface is detected, the 4 corners of a square will appear. At this point, invite the user to continue exploring. This will give the application more time to detect details and define a suitable surface to place the product. The square’s behavior and display is handled by our SDK. The reset button can be displayed to let the user restart the process in case of detection problem.

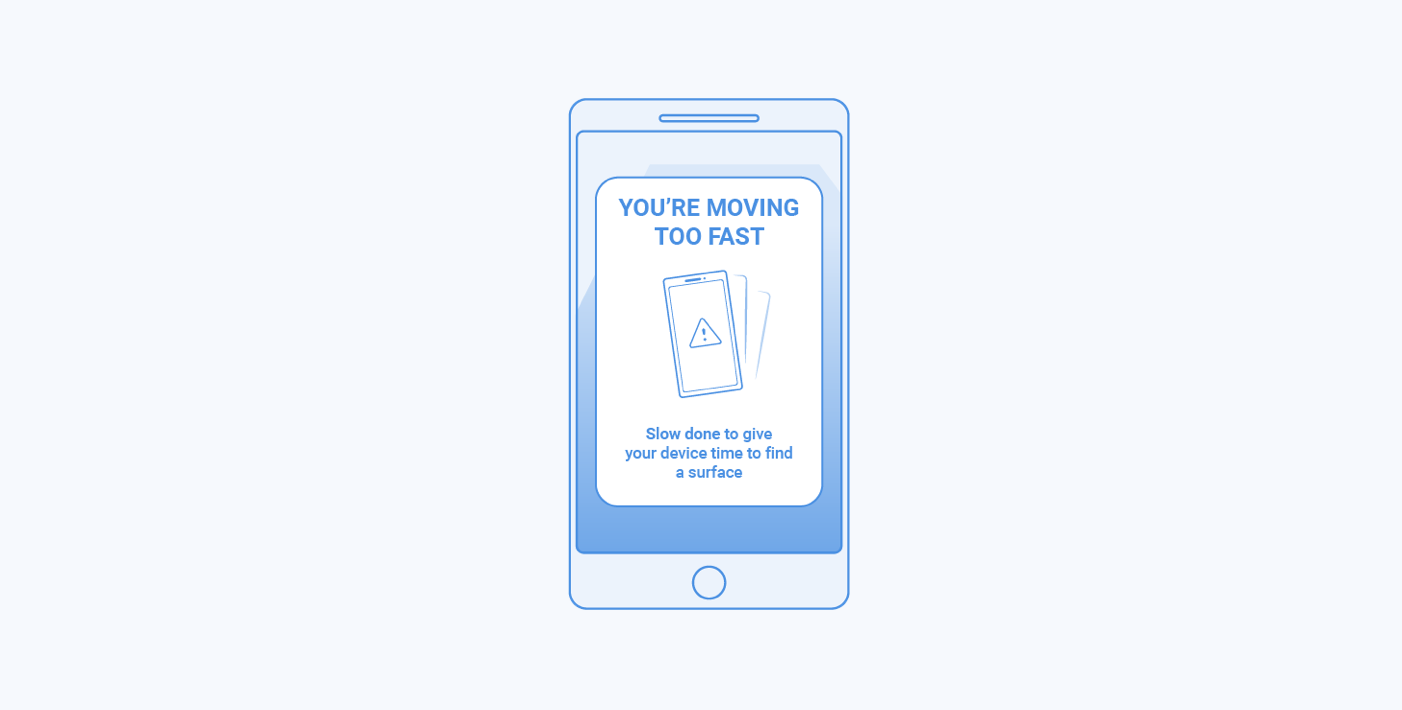
In some cases there may be difficulties detecting surfaces. We recommend displaying possible solutions to the user so that he can proceed to successfully detect a surface and place the product at the right place. Here are our recommendations:
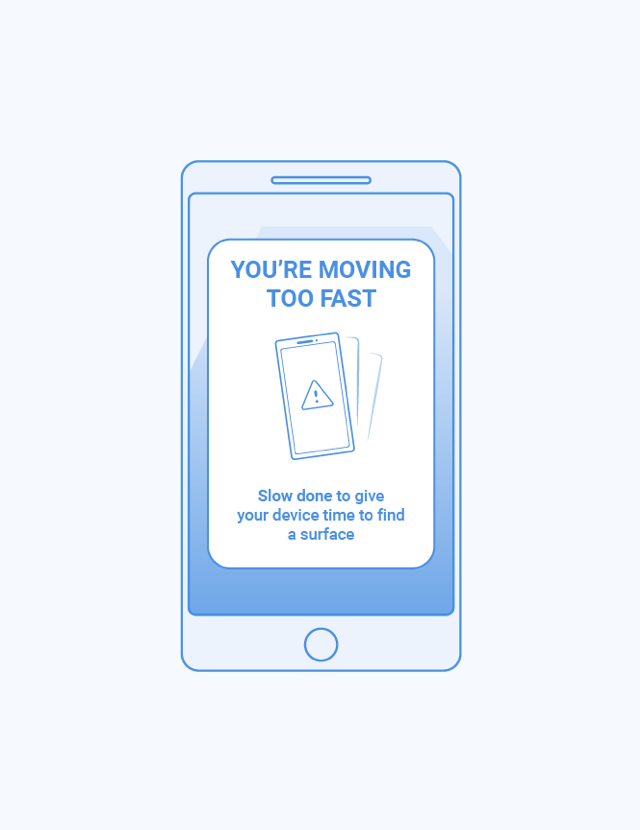
- Excessive Motion: During the setup process, excessive motion can stop ARKit from detecting surfaces. It is good practice to display a message inviting the user to move the device slowly.
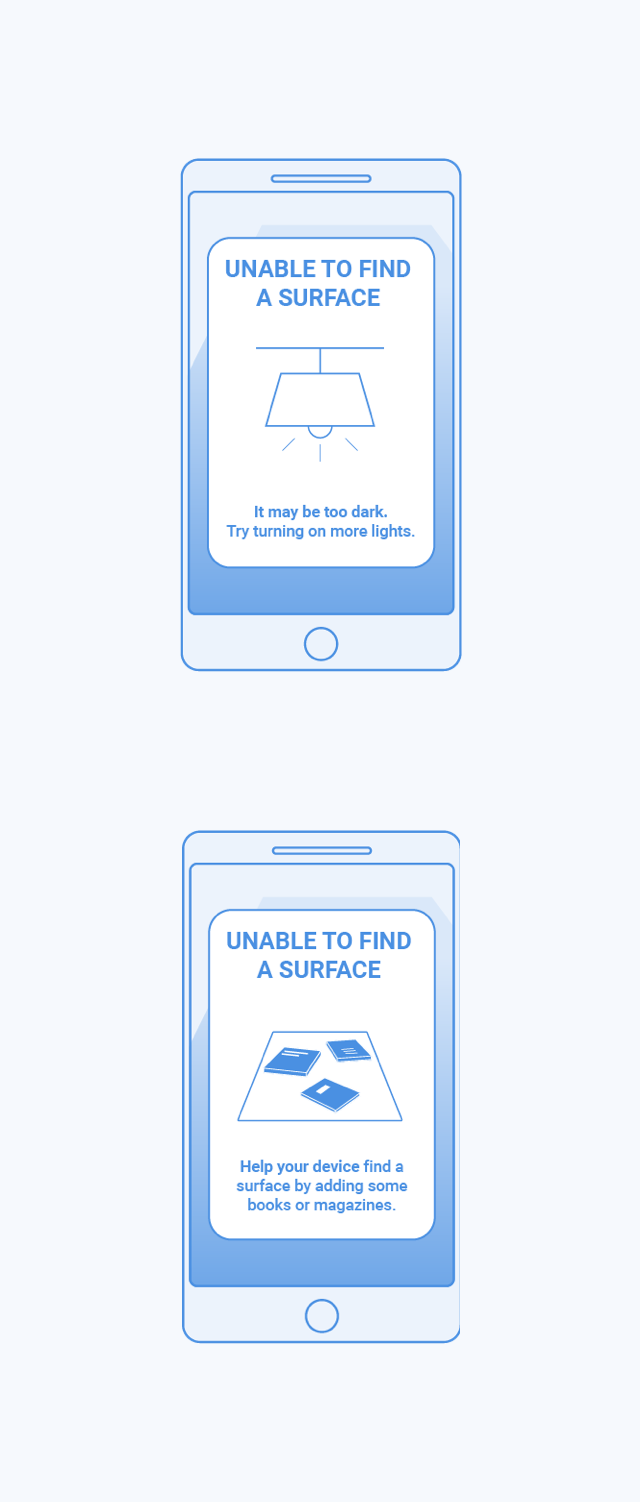
- Insufficient features: ARKit may also have difficulty detecting surfaces when there is not enough light or when the surface lacks detail (ex. a uniformly colored or patterned surface). In such cases, invite the user to turn on the lights or add ‘details’ by adding props, books, magazines etc to the surface.

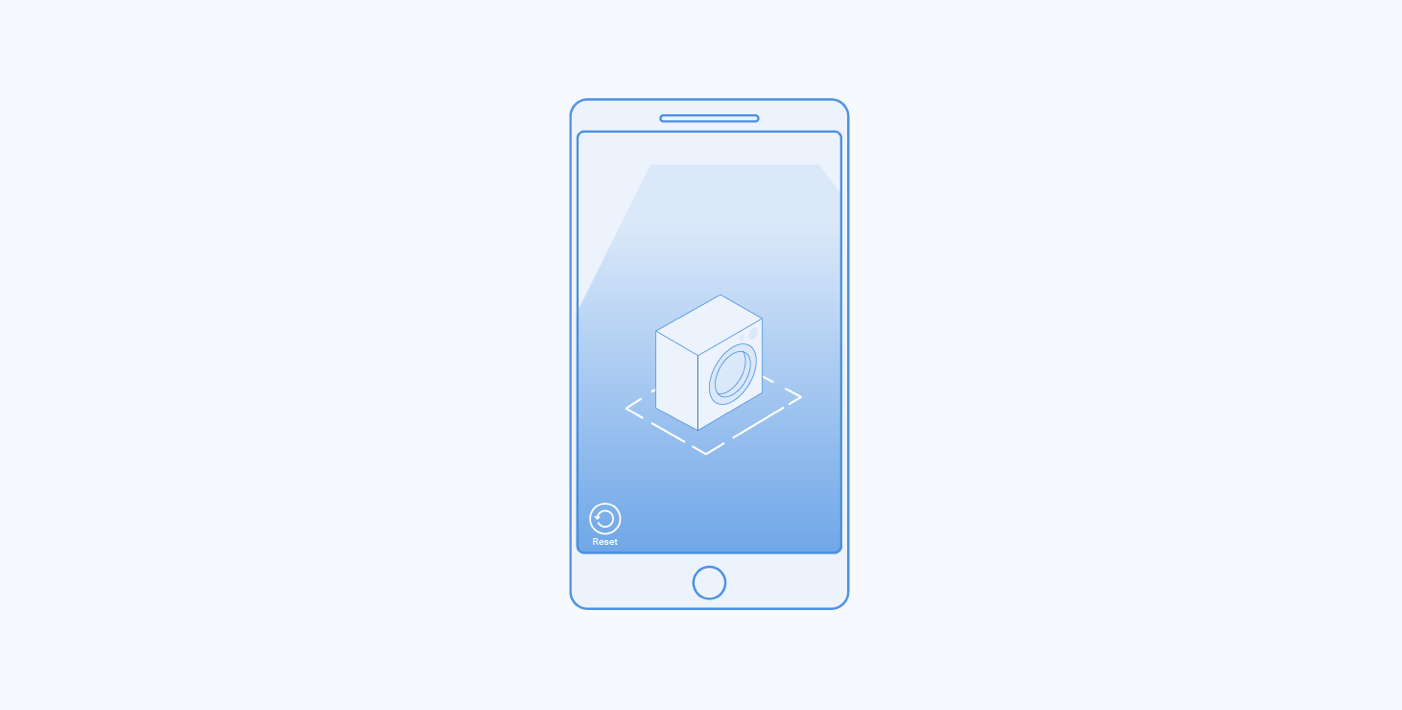
Surface Detected and Product Placement
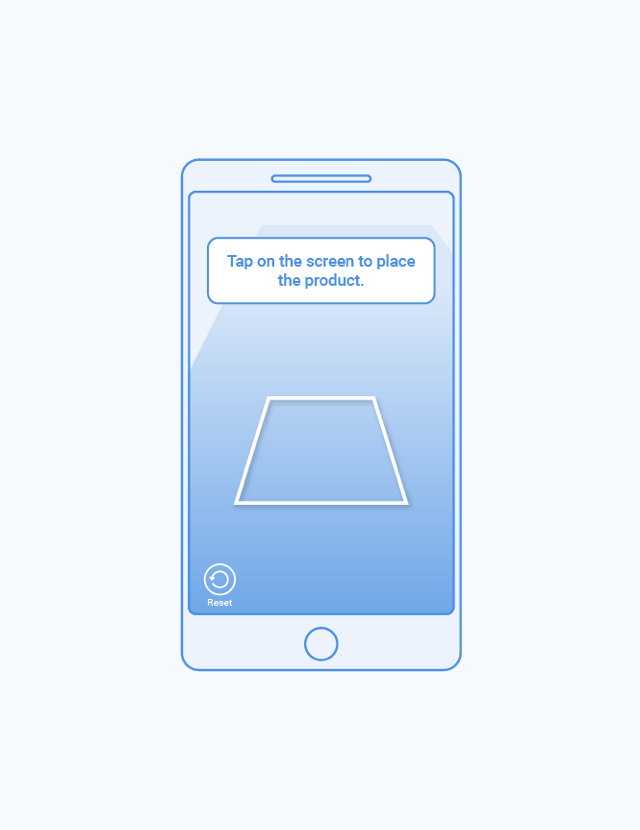
When there is enough detail to define a surface, a full square will appear. The full square indicates that the user is now able to place the product. Invite the user to tap the screen in order to place the product where the square is. Before this step, the user cannot tap to place a product.

Product Placed
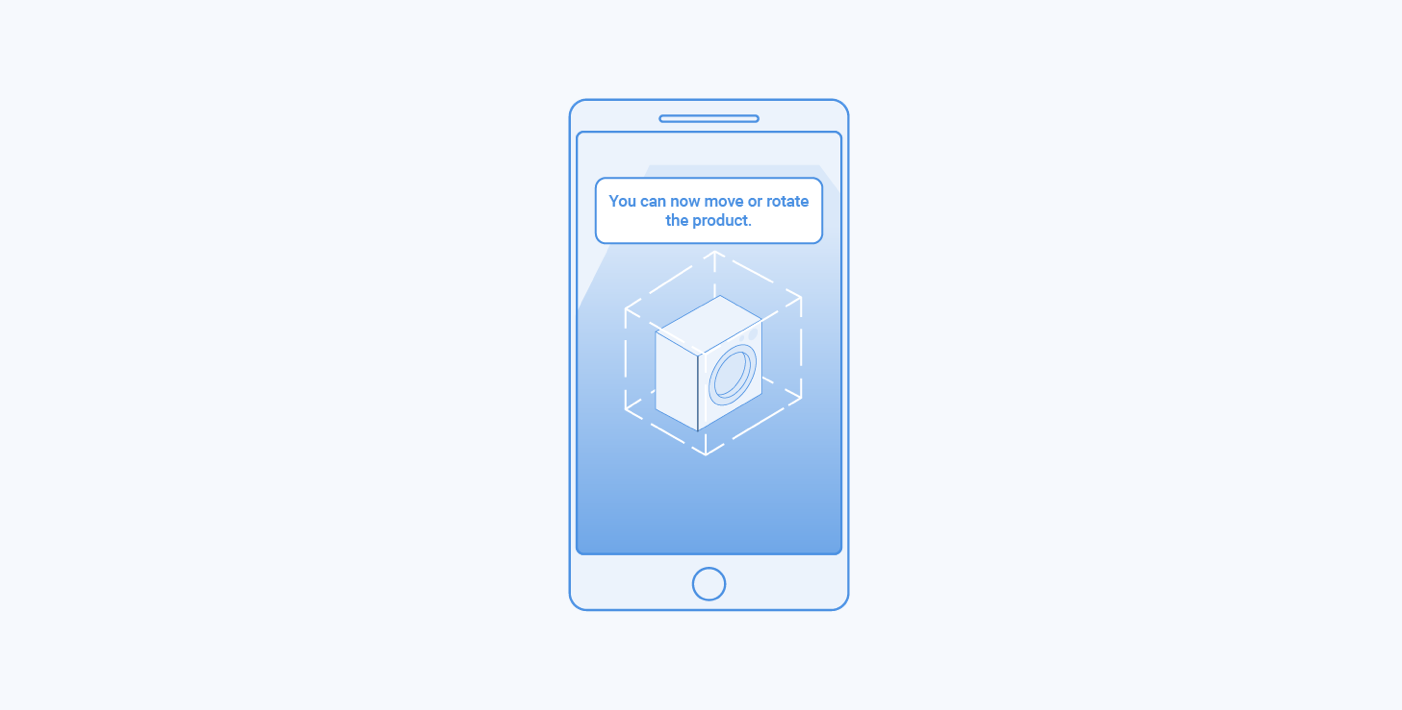
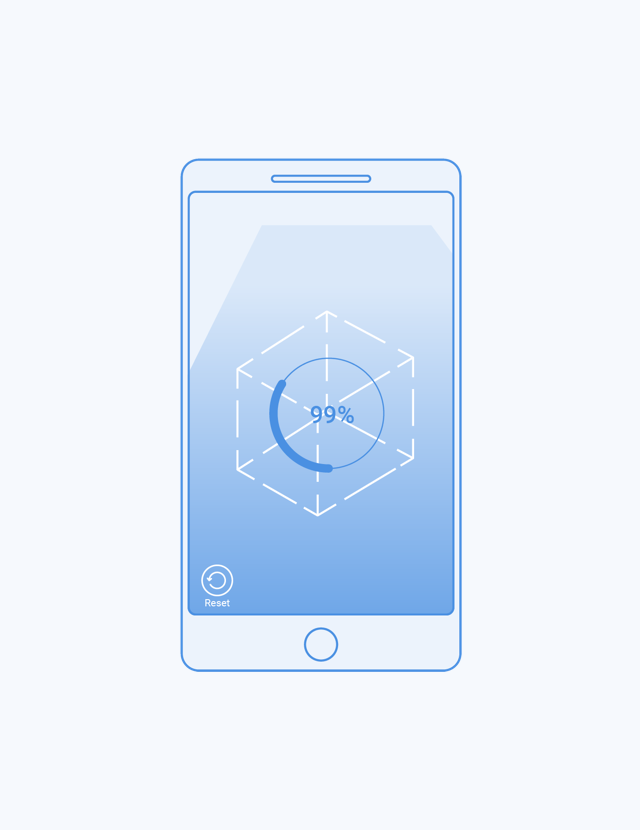
Once the product has been placed on the surface, the bounding box will display. If the product is already loaded, it is displayed directly. If product loading is not yet finished, a loading wheel will appear until the product is fully loaded (see product loading section for details).
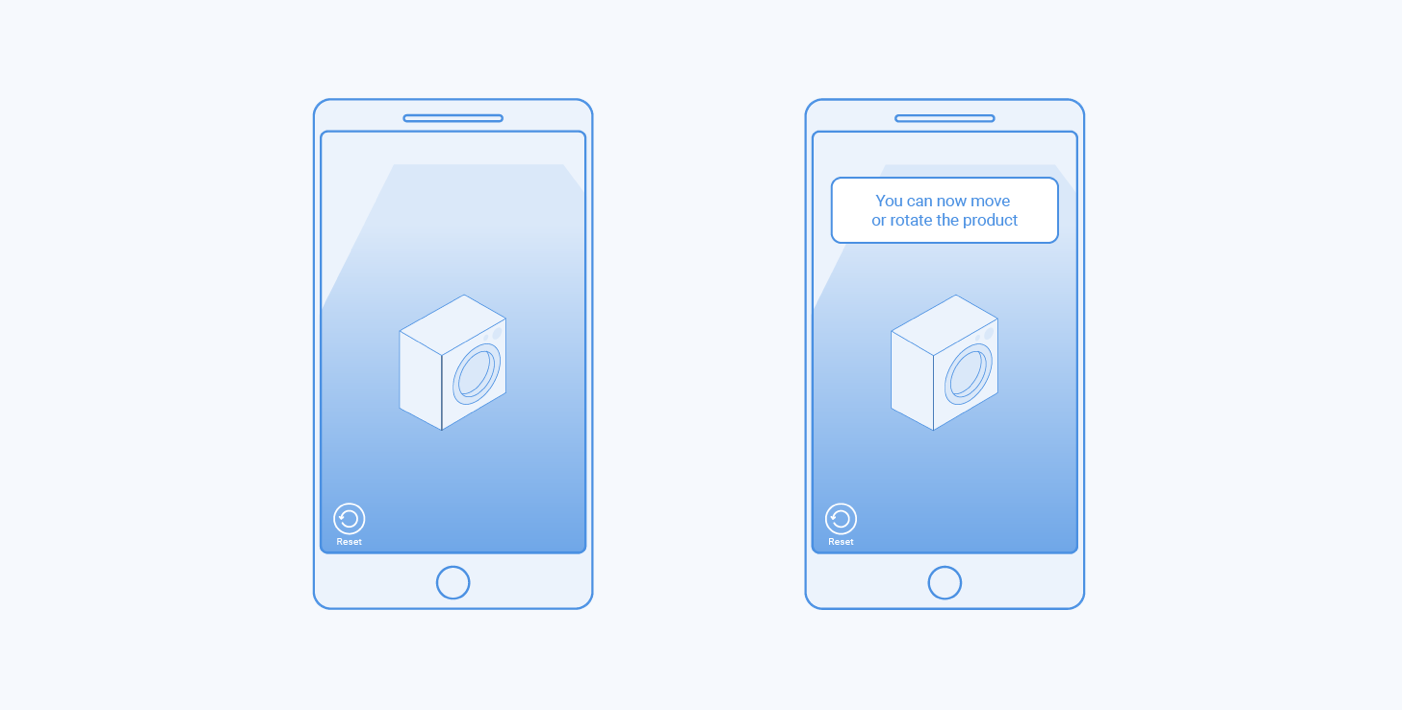
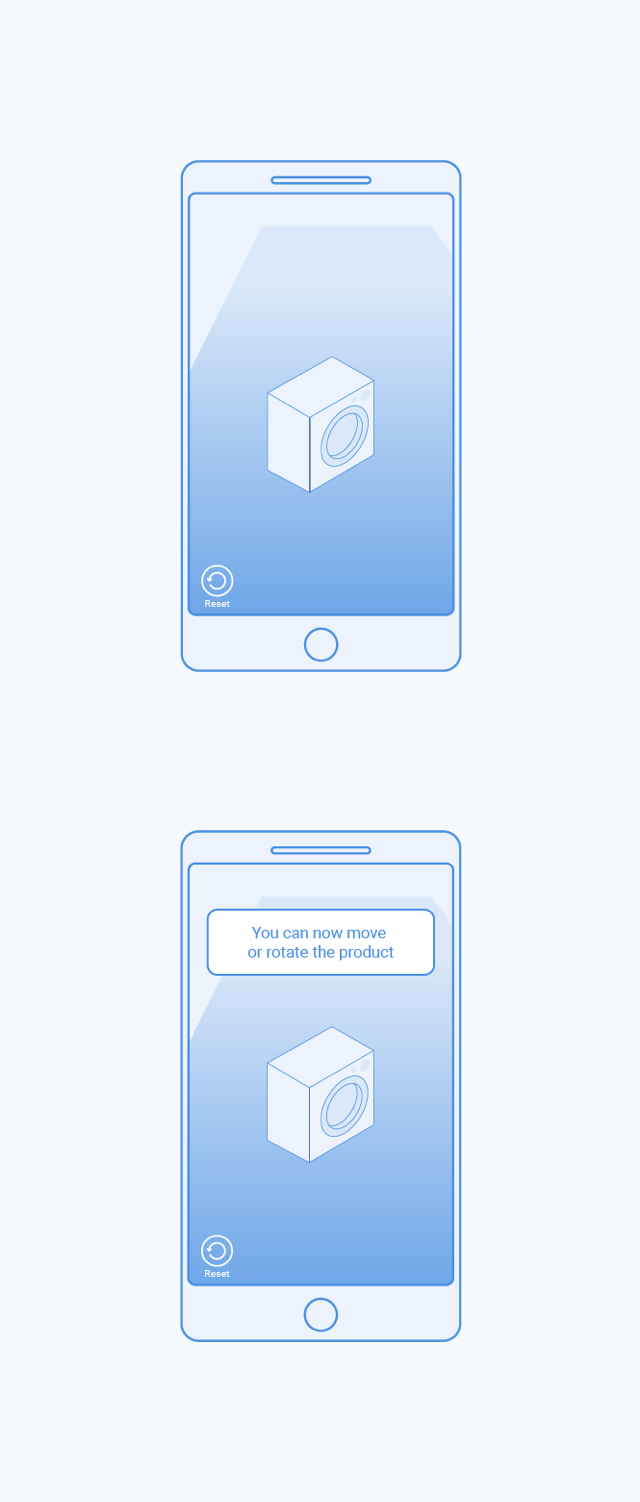
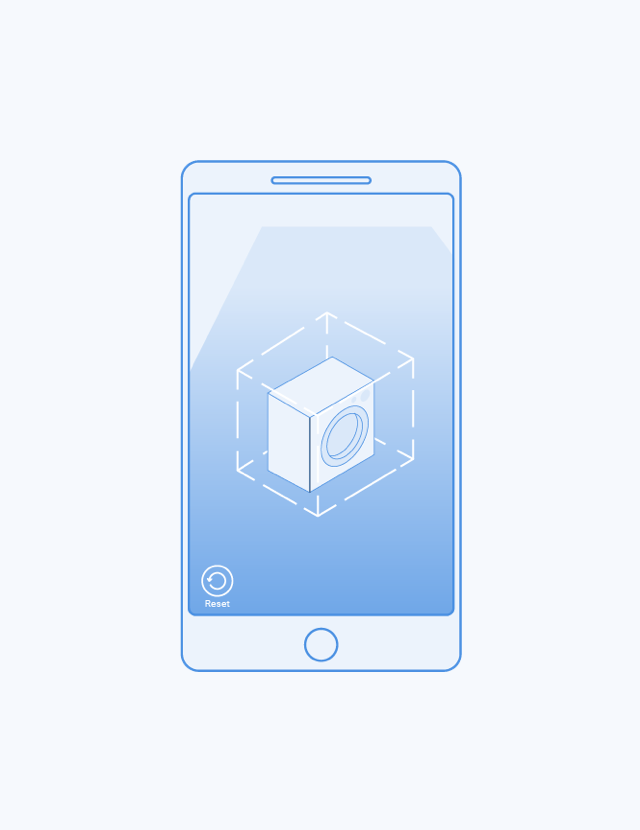
During the loading or when the product is fully loaded, the user can move and rotate it to place it according to their convenience, it is recommended to invite him to do so.
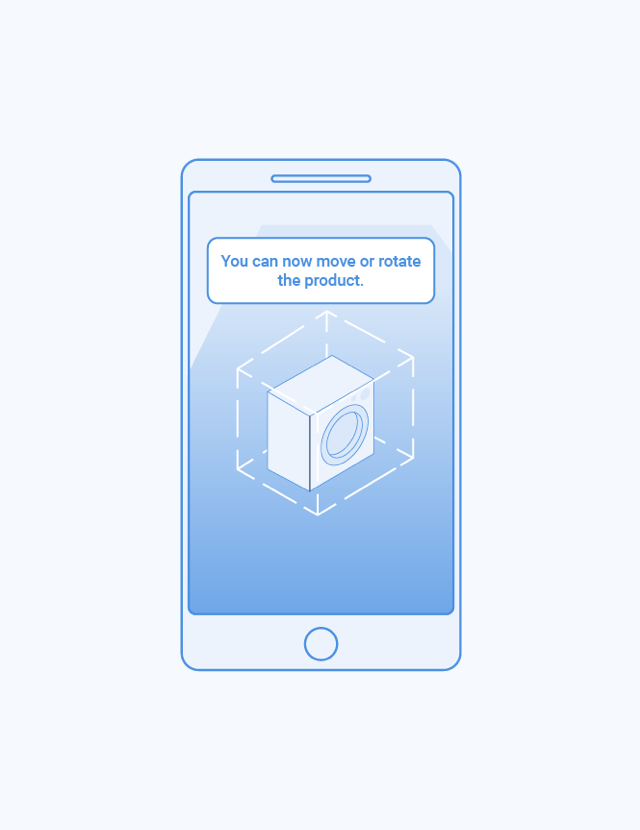
Invite to move around
Once the product is placed, it is a good practice to encourage the user that he can move around it and look at it just like if it is a real product.


Gestures and User Interactions
Gestures
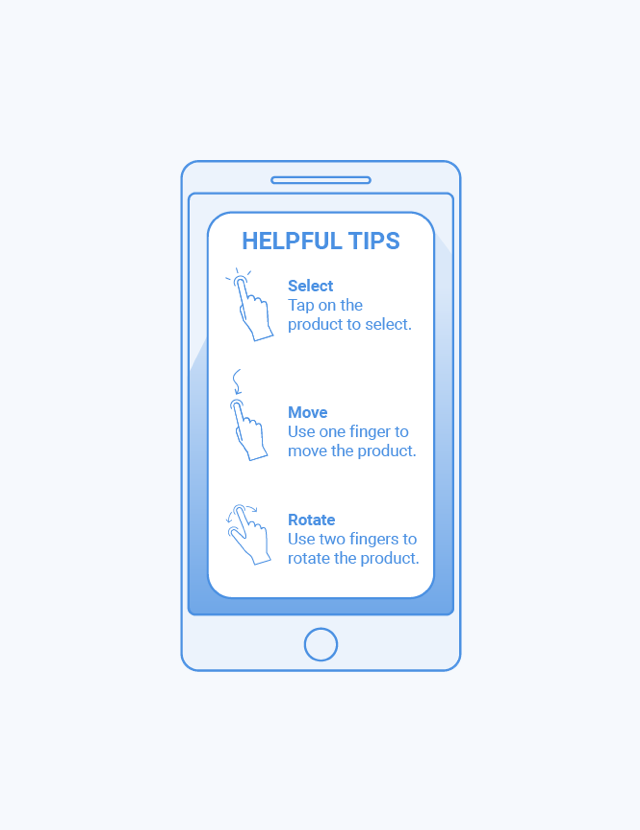
For ARKit, there are three familiar gestures for selecting, moving, and rotating a product. These gestures are well known to iOS users but it is good practice to include an on-demand tutorial for those unfamiliar. We recommend one of two tutorials:
A step by step one like this:
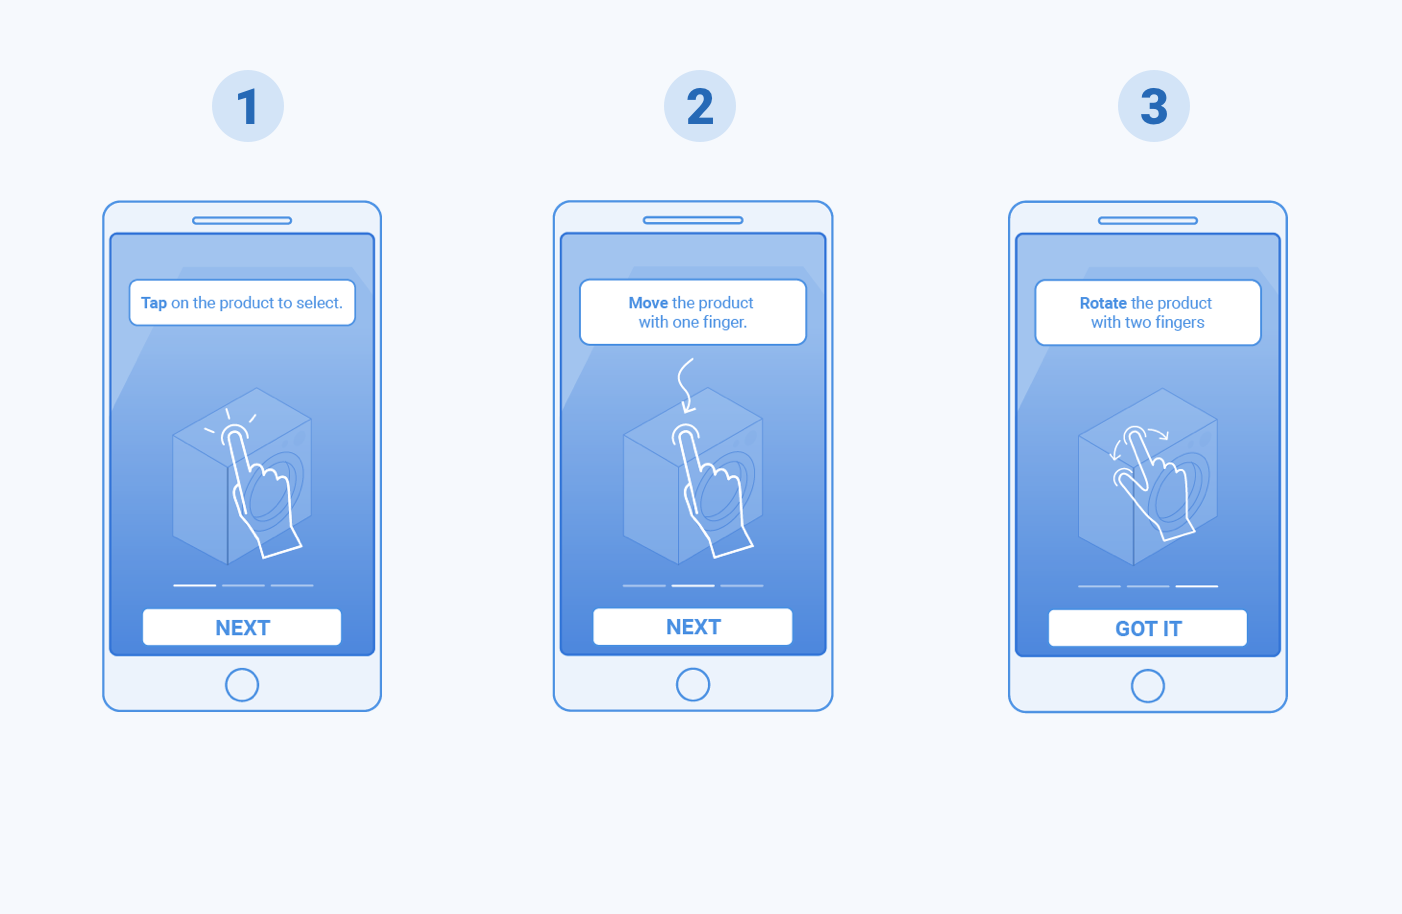
Or a single page one like this:
Product Selection
When a product is selected, a square is displayed around its base to visually indicate to users the chosen product. The user can un-select a product by tapping on the screen, and thereby cause the square to disappear.
Product Motion
When a product is moved or rotated, the bounding box is displayed as visual feedback. The bounding box disappear when the user stops the gesture.

Product Loading
Product loading includes both the product download time as well as the time it takes to display the product. Factors such as network service as well as device performance can impact product loading.
To reduce the product loading time as well as reduce notice by users, product loading starts at initialization. In some cases (for example, under poor network) the setup process time won’t be enough and the product won’t be ready at selection. In this case, the product will display a graphic to indicate loading (see left), similar to a loading wheel, in the bounding box. During this time, user can start moving and placing the product in their desired location.

Reset of scene
Resetting the scene allows the users to restart their AR experience in cases where the user runs into issues placing and anchoring the product, or where the user has lost the product (ie: the product is not visible in the screen).
Resetting the scene will remove the product in the scene and will restart the surface detection procedure so that the user can place the product again at the right place.
After a reset, it is recommended to display surrounding exploration instructions and carry on the process from the start.
 1 - Tap: The user tap on the reset button.
2 - The product is hidden, and the exploration phase starts all over again.
1 - Tap: The user tap on the reset button.
2 - The product is hidden, and the exploration phase starts all over again.
Tracking with Gyroscope
Product Placement:
For mobile devices that are not compatible with ARKit and need to be placed on the floor, the device’s gyroscope is put into use. There is no surface detection available in this case and the product is automatically place at floor level.
Augment’s SDK will provide product specific information (i.e. if it is better suited for floor placement or for table placement). As the integrator of the SDK, you will have to provide the appropriate instructions according to this information. For example, a sofa will require gyroscope tracking and you will need to provide the instructions below to accompany that sofa: check value of on table or on floor, and display the right tutorial
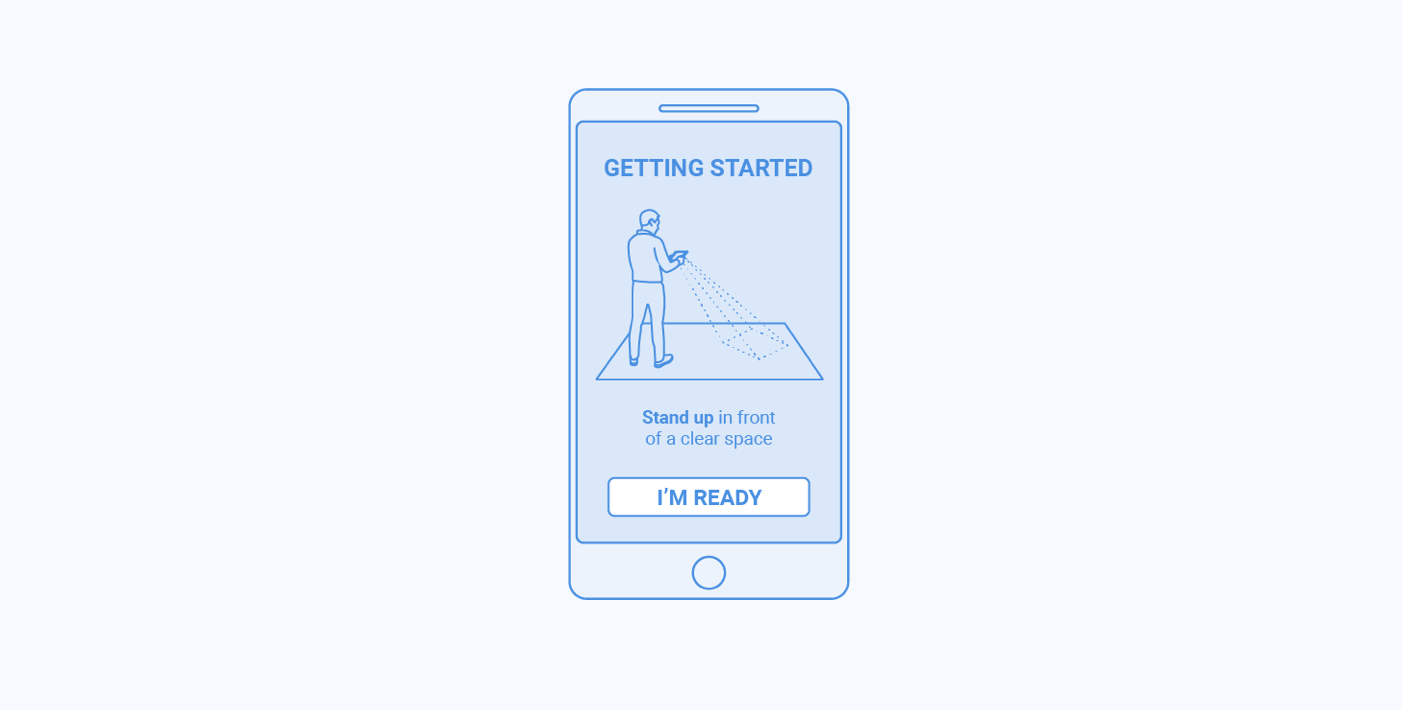
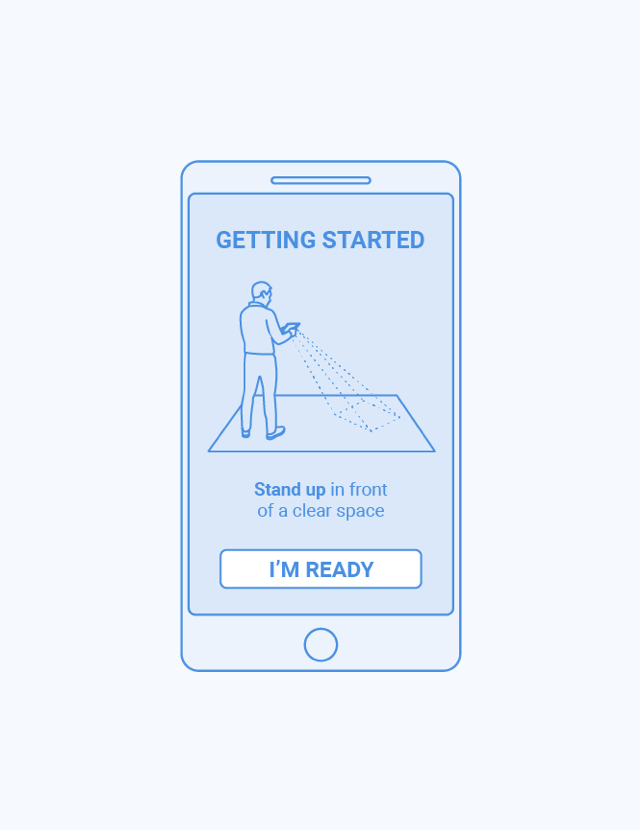
Invitation to Stand Up
With use of the gyroscope, the position and movement of the device is unknown. We therefore recommend users to stand up in front of a clear space. Once the product is placed, the product will move with the device. Therefore, we recommend the user stay in place.
Product Placed
Once the user is in position, the product is automatically placed in front of the user. Invite the user to move and rotate the product to his or her liking.

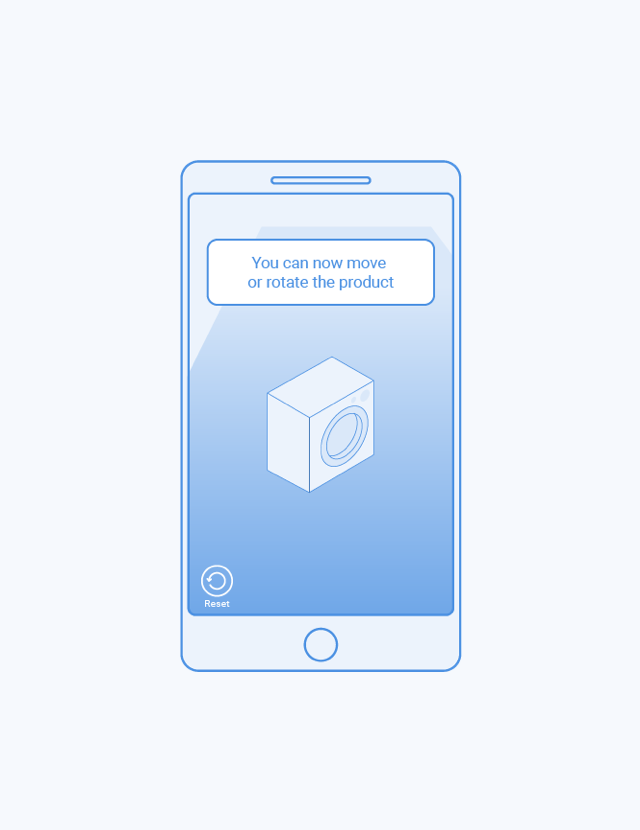
Gestures and User Interactions
Gestures
When tracking with gyroscopes, gestures are slightly different. While the gesture to move products remain the same, product are rotated by sliding two fingers in an up and down movement. The familiar gestures used with ARKit will be migrated to all tracking methods to maintain consistent user interactions and gestures across all methods.
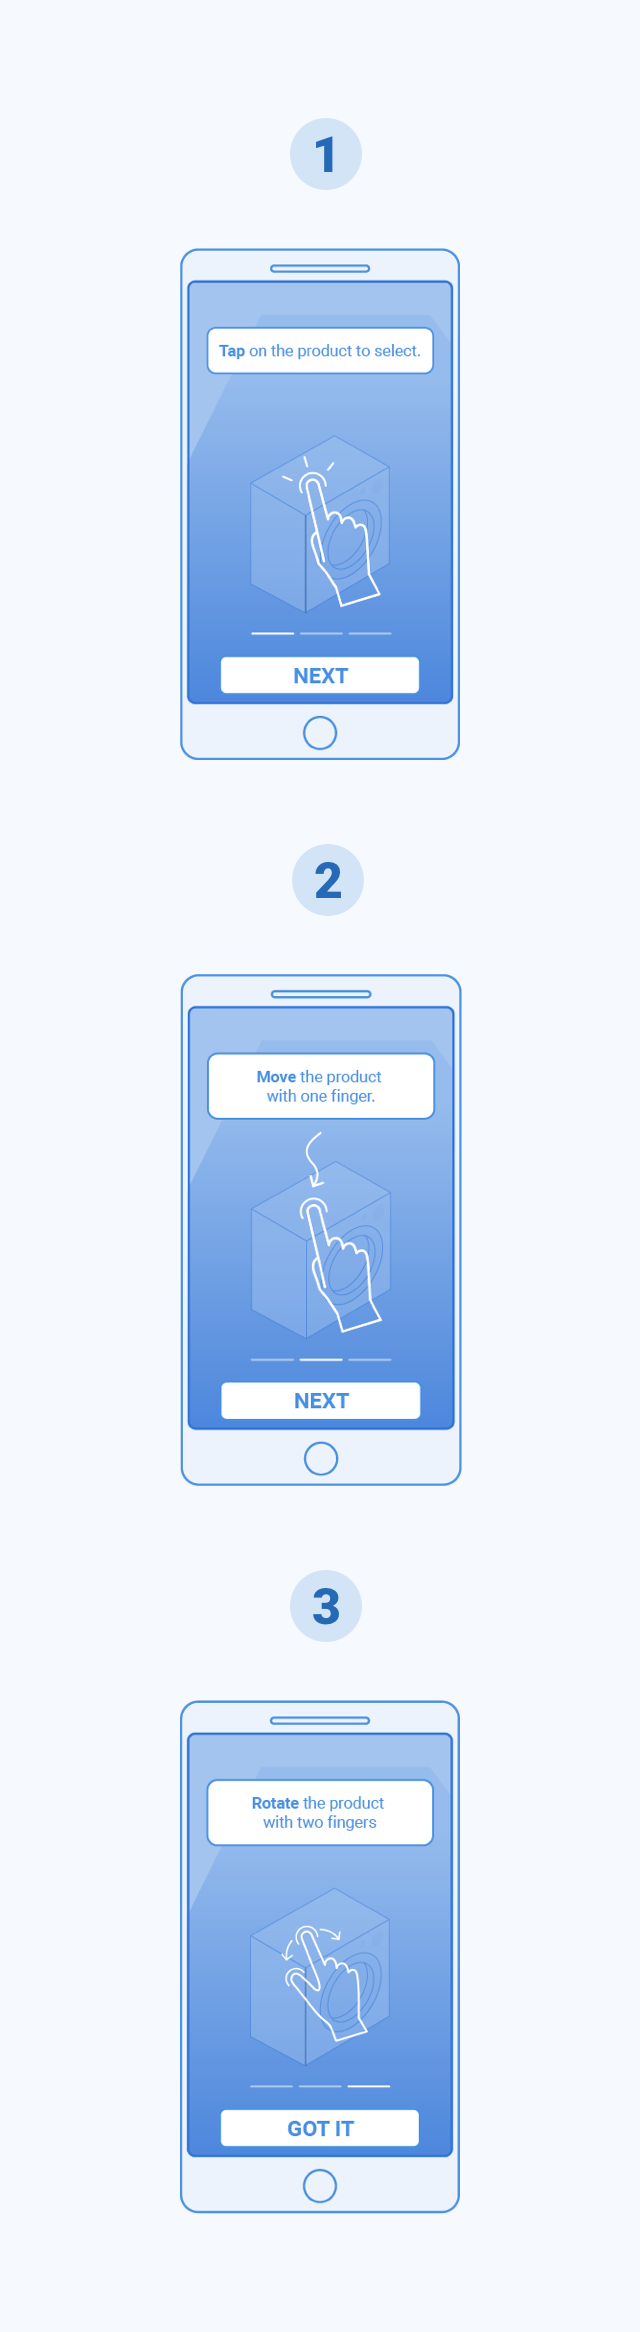
We recommend 2 types of tutorial, a step by step one like this:
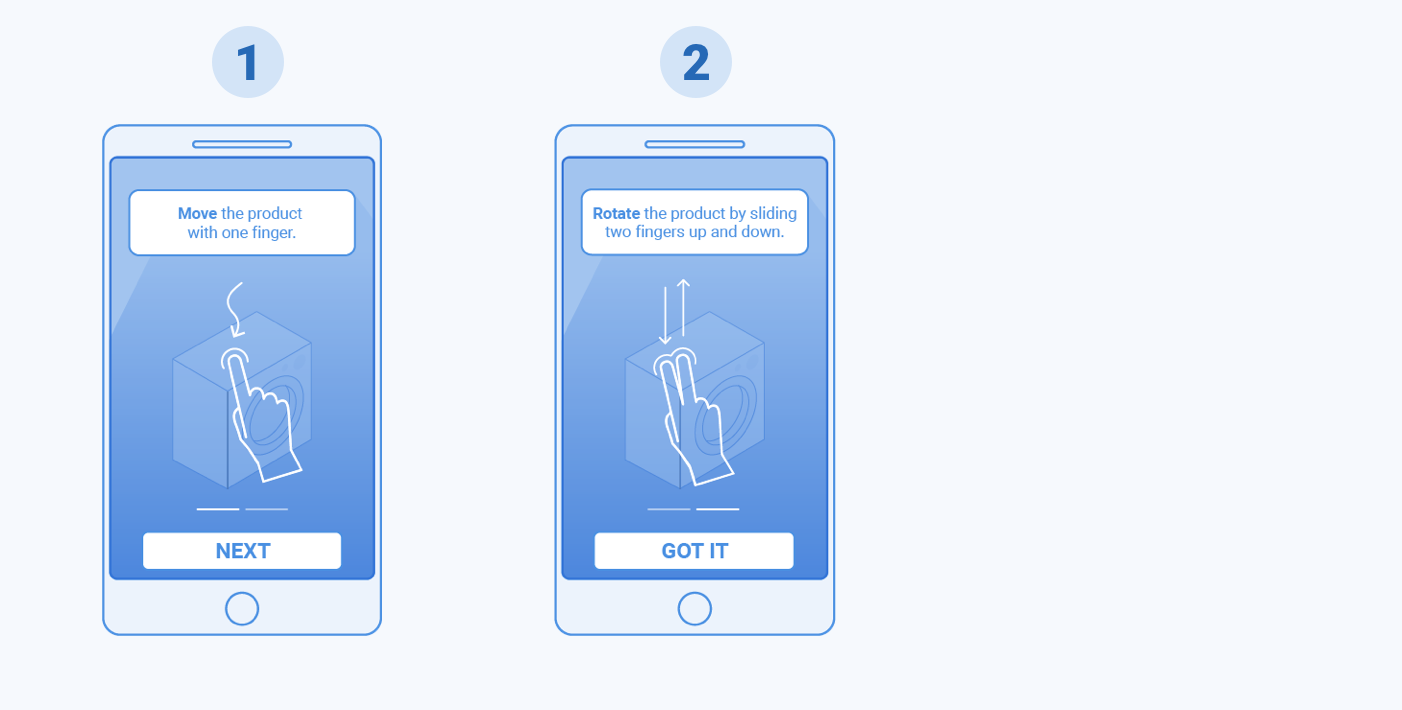
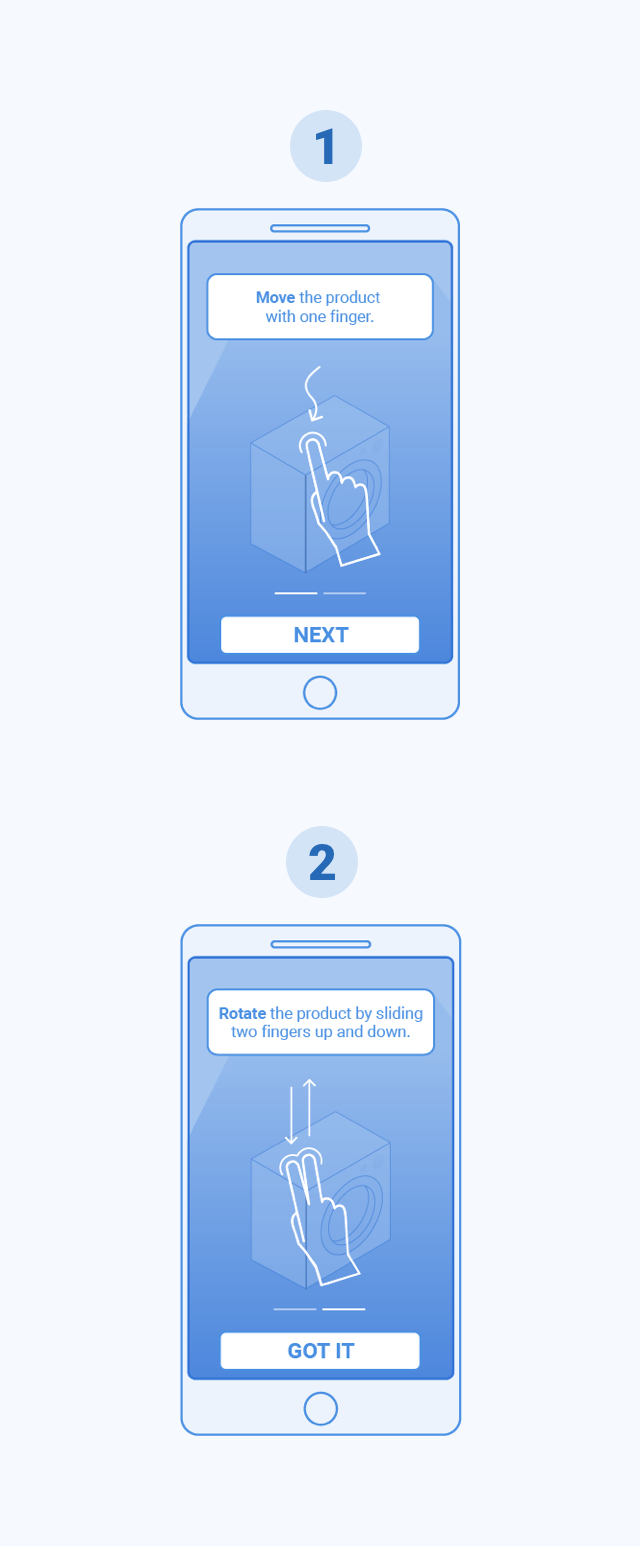 1 - One finger: Moving the product
2 - Two fingers: Rotate the product
1 - One finger: Moving the product
2 - Two fingers: Rotate the product
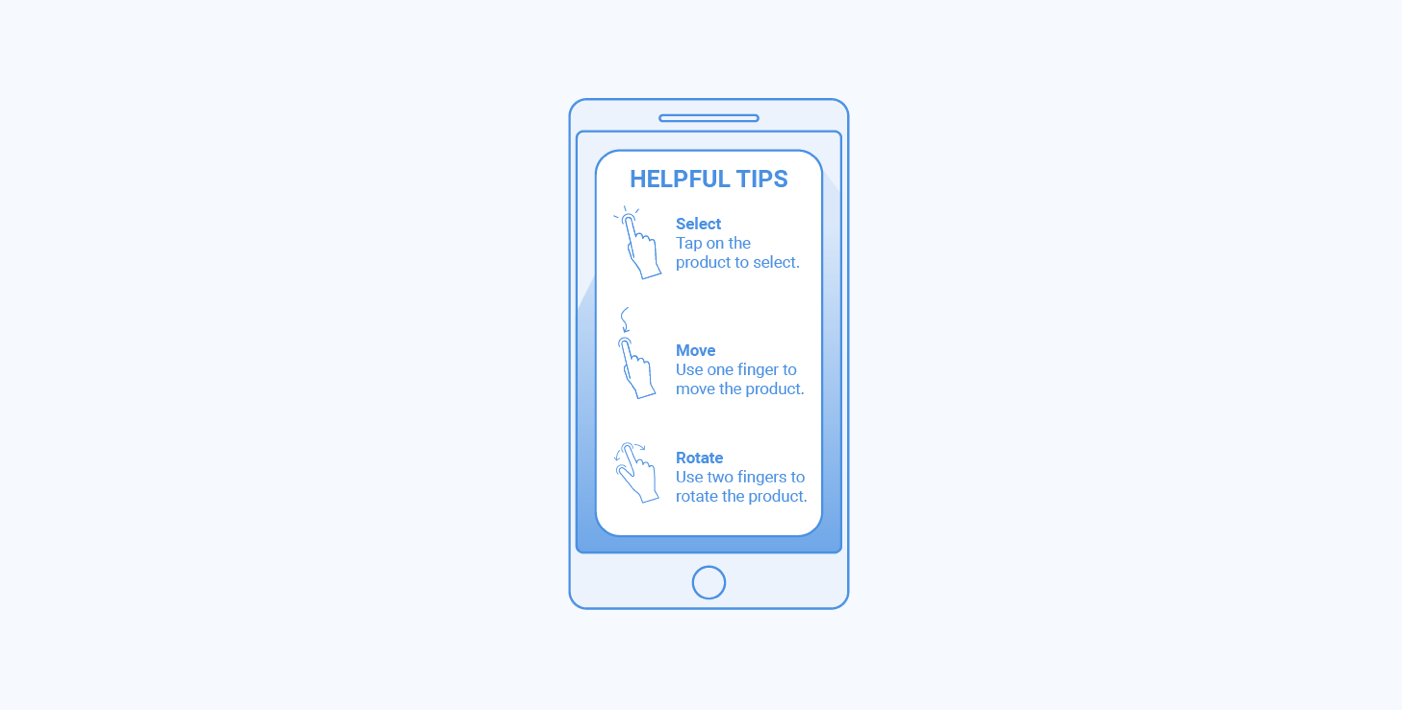
Or a single page like this:
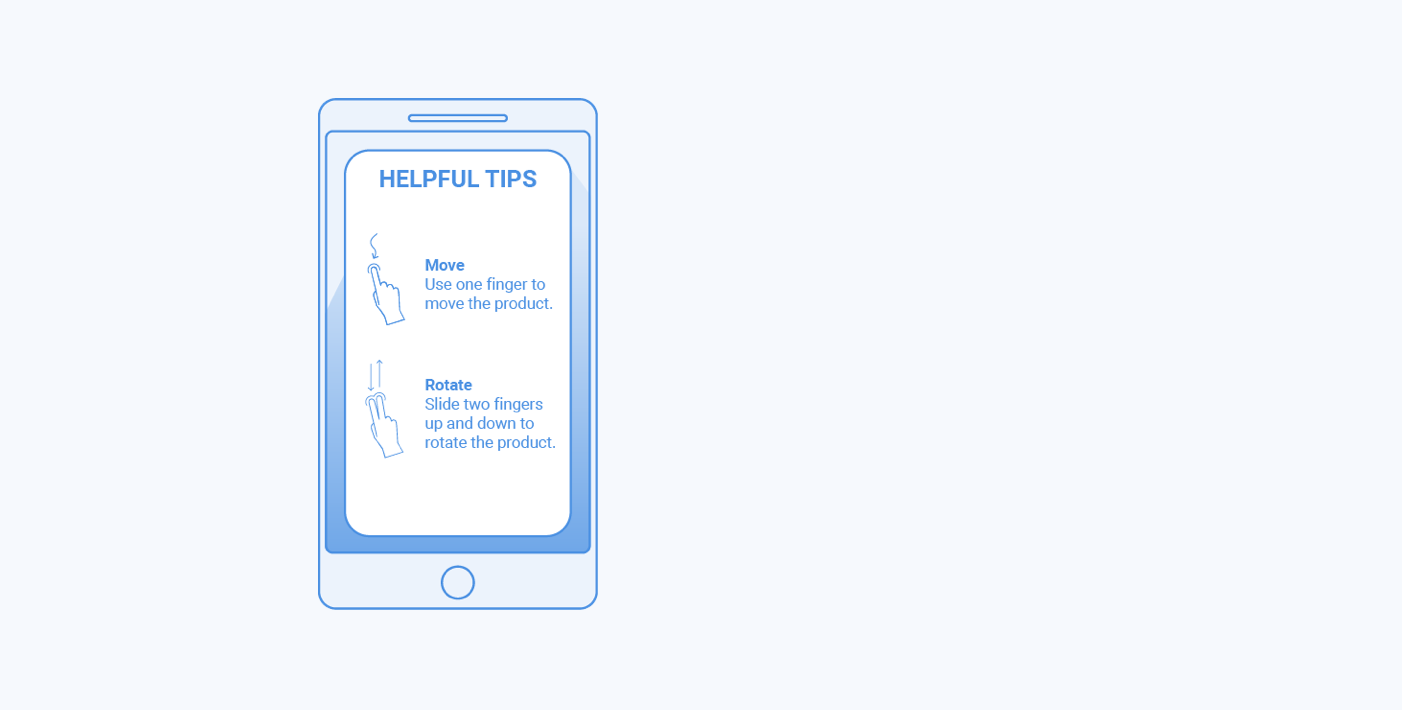
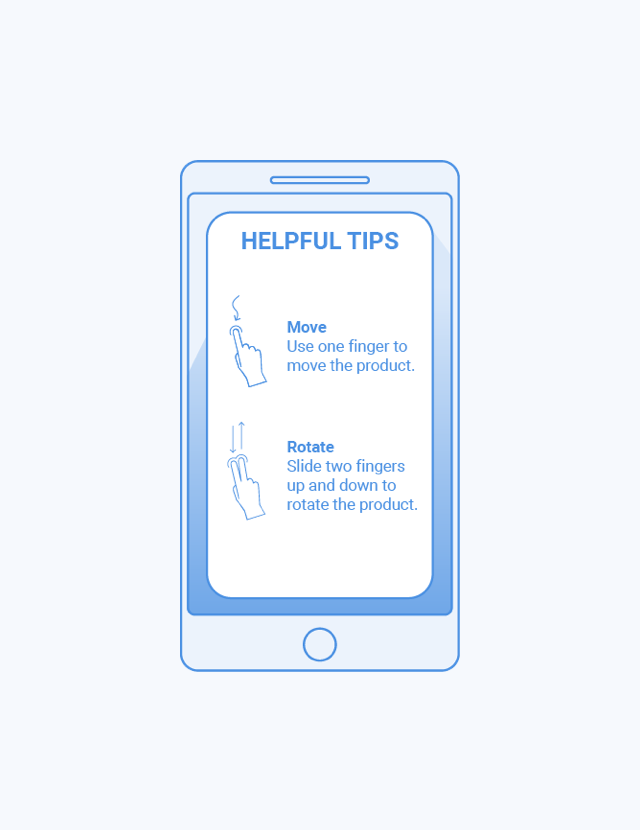 Gestures summary: Instead of a gesture tutorial, you can
provide to the user a quick summary page of the
common gestures to interact with a product.
Gestures summary: Instead of a gesture tutorial, you can
provide to the user a quick summary page of the
common gestures to interact with a product.
Product Selection and Motion
There is no selection indicator and no bounding box displayed when the product is moved using the gyroscope. They will soon be added to keep user experience consistent across tracking methods.
Reset of scene
Resetting the scene allows the users to restart their AR experience in cases where the user runs into issues placing and anchoring the product, or where the user has lost the product (ie: the product is not visible in the screen). Resetting the scene relocates the product in front of the user. Invite the user to move and rotate the product to place it once again at the desired location.